USA TRAVEL GUIDE
Grand Canyon Photography from Mather Point: Layers, Scale and Rim Access
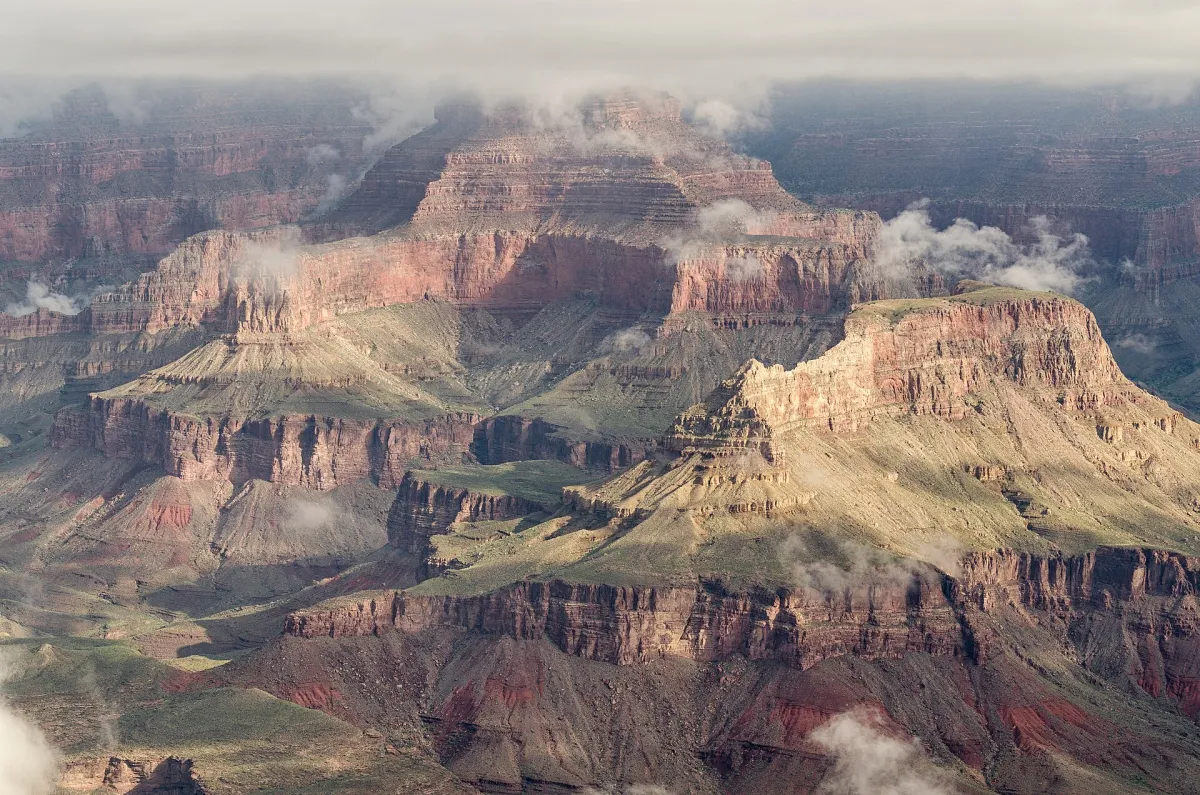
Mather Point provides a broad view into the Grand Canyon’s layered landscape. The reference photograph, dated 9 September 2013, combines shaded formations, brighter rock faces and vegetation on the nearer rim. Its source specifically notes that the greenery followed earlier rain or snow. That detail is useful context: the picture should not be treated as proof of typical vegetation or weather on a future visit.
Read the canyon in layers
The foreground rim establishes where the viewer stands, while successive rock formations create depth towards the distance. Rather than searching for a single central object, notice the alternating light and shade. Bright faces can help separate one formation from another; a dark shadow may connect shapes that would otherwise read as separate towers or ridges.
A very wide view communicates scale but can make individual formations small. Try a second frame that selects a few clearly separated layers. Keep enough context for the subject to remain recognisably a canyon rather than a pattern of abstract colours. A person is not required to provide scale, and no one needs to approach an edge simply to make the photograph more dramatic.
Choose a foreground and a small number of canyon layers
Before making the widest possible photograph, identify the nearest visible rim, a middle formation and a more distant layer. These give the eye a route into the landscape. The reference includes greenery close to the viewer and brighter rock beyond it. That foreground can help explain depth, but it should not cover the formations you want to show. Look for an arrangement that already works from the permitted viewpoint rather than stepping away from a safe surface to manufacture one.
Shadow is as important as the illuminated rock. A dark band may separate two formations or merge them into a single shape. Compare a wider image with a tighter selection containing only a few readable layers. In the second version, give the viewer a clear reason to look at that particular part of the canyon: a distinct ridge, a repeated shape or a useful relationship between light and shade. Simply enlarging an arbitrary central section may not make the landscape easier to understand.
Review the photograph without zooming into tiny details first. If the canyon reads as a confused texture at normal size, a simpler arrangement may be stronger. Conversely, a broad view can communicate vastness even when the individual formations remain small. Choose according to the image’s purpose. A useful series can contain both an overview and a concentrated study, provided each contributes something different and the captions keep their shared Mather Point context clear.
Choose a short rim outing before a longer hike
This image is a rim viewpoint photograph, not evidence of a trail descent. Decide whether your goal is a convenient canyon view, a short walk with changing angles or a substantial hike. These choices have different physical demands and preparation requirements. It is entirely reasonable to make a useful photographic sequence from permitted rim paths.
The National Park Service’s Mather Point Rim Trail information describes connections along the South Rim and identifies shorter sections as alternatives to walking the full trail. Use the current official route information to select a manageable outing. Check alerts, weather and transport separately; a general route description does not guarantee that every section or shuttle is operating on your date.
Let light determine which formations matter
At some moments, a broad view contains distinct bright and dark layers; at others, the canyon may look flatter. A change in light can therefore matter more than a change of camera. Before moving, look for a small arrangement that already has clear separation. This can produce a stronger photograph than insisting that every visible part of the canyon must appear in one frame.
The illustrated image records a particular September morning, not a universal recommendation for one hour or season. Cloud can create moving patches of light, while haze may soften distant layers. Work with the visibility you have and be prepared to stop photographing if weather deteriorates. The source does not establish the photographer’s precise settings, and this page does not invent them.
Keep the viewpoint usable for everyone
Mather Point can attract people who are looking at the canyon as well as making photographs. Keep pathways clear, share space at railings and step back before checking a long burst of images. Do not climb barriers, move beyond authorised surfaces or follow another visitor onto an unprotected edge. A slightly different safe position is a better choice than an exact but hazardous imitation.
Comfort also affects the quality of an outing. Carry what you need for the route and conditions you choose, including water and appropriate protection from sun, cold or rain. Even a short rim stop can become unpleasant if you wait longer than planned for a particular light effect. Use the official park information for current conditions rather than drawing practical conclusions from the photo’s clear view.
Plan a rim photo stop that works for the whole group
A photography stop can involve much more waiting than an ordinary viewpoint visit. If you are travelling with others, agree on a comfortable stopping place and an approximate plan before becoming absorbed in the canyon. Some people may want to keep looking, sit or continue a short authorised walk. Choose a session that fits those needs rather than assuming that every member of the group wants to wait for a particular patch of light.
Use the NPS route information to decide whether a short out-and-back section suits the visit. A little movement along an open rim path can change the foreground and the overlap between formations, but you do not need to turn that into a long hike. Check the surface, gradients and current conditions for the exact section you choose. A general description of a largely paved route does not establish that every point is equally suitable for every visitor or mobility device.
Before returning, make one final frame that includes enough of the scene to identify the location and its scale. This can be more useful than leaving with only tightly cropped rock patterns. Keep the source photograph’s history separate from your own observation: the September 2013 greenery is documented context, while the vegetation, weather and light you encounter should be described on their own terms. Your photographic plan can remain successful even when those conditions differ.
Make the historical photograph useful today
The 2013 frame is useful because it records the view’s structure and the creator’s observation about unusually visible greenery. It does not show present crowd levels, path conditions or vegetation. Keep that distinction in the caption and surrounding explanation. A dated but accurately described landscape photograph can still help a reader plan a thoughtful composition.
For a varied set, make one establishing view, one tighter study of rock layers and one image that includes the permitted rim setting without exposing anyone to an edge. These frames explain scale, form and visitor context. Return to the wider USA Photo Spots guide to compare this open landscape approach with city skylines and coastal views.
Continue planning your USA trip
Sources and further reading
FAQ
Does this photograph show a hike below the rim?
No. The source identifies Mather Point on the South Rim. A viewpoint visit and a canyon descent require different planning.
Why is the greenery mentioned?
The creator’s source description links it to earlier rain or snow. Keeping that context prevents a single photograph from being presented as a normal vegetation forecast.
Must I walk the full Rim Trail for good photographs?
No. The NPS describes shorter sections that can provide changing canyon views. Select a route suited to your ability and the current conditions.