USA TRAVEL GUIDE
Walking & National Parks in the USA: Trails, Passes and Access
A national-park holiday works best when the walking fits your party and the route fits the season. The scenery on a map says little about the effort, road access or reservation needed to reach it. Choose a small set of parks and suitable overnight bases, then select walks by elevation change, exposure, surface and return transport. This guide compares several contrasting landscapes and explains the access checks that matter before departure. Park fees and entry systems are not uniform: an annual pass, a timed-entry booking, a parking tag and a backcountry permit can be different products. Verify the current park page for your dates rather than relying on an older road-trip checklist.
Choose the walk before adding more parks
Begin with the least confident member of the group. A short route can still involve steep steps, slippery rock, altitude or sustained exposure to heat. Read the park's route description for distance, ascent and descent, surface, access and current closures. Decide how you will turn around and how much daylight remains for the return. A viewpoint reached by a manageable path can be a better holiday choice than a famous summit that exceeds your experience.
Allow a meaningful stay at each base. Changing accommodation after every scenic stop can consume the time you expected to spend outdoors, particularly when a park entrance is far from the first walk. Compare two shorter walks from the same base with another long drive. Keep an alternative for heat, smoke, storms or a full parking area, rather than treating a permit or hotel payment as a reason to continue in unsuitable conditions.
Use the official NPS app and download relevant park information before losing reception. Offline material is useful, but it does not replace checking current alerts while you have a connection. Keep a backup map and make sure someone outside the party knows the route and expected return.
Swipe horizontally if needed to compare all columns.
| Item | What it addresses | What to check separately |
|---|---|---|
| Entrance pass | Eligible admission charges | Timed entry, camping and controlled activities |
| Timed-entry reservation | A specified access window where required | Entrance charges and the area covered |
| Smokies parking tag | Applicable vehicle parking requirement | Actual parking space and display rules |
| Backcountry or activity permit | The named controlled activity | Route conditions, equipment and other bookings |
| Accommodation reservation | The booked bed or campsite | Park admission and unrelated trail permissions |
Understand passes, reservations and nonresident fees
The 2026 NPS nonresident policy applies an additional $100 per non-U.S.-resident visitor aged 16 or older at eleven designated popular parks, unless the visit is covered by a qualifying pass. The nonresident America the Beautiful annual pass costs $250 and covers eligible entrance charges for a private vehicle, or the holder plus three adults at sites charging per person. Check the actual eligibility and coverage before comparing options.
Admission is only one layer of planning. Accommodation, campsites, controlled hikes and timed-entry reservations can require separate arrangements. Do not assume that a pass guarantees a parking space or overrides an activity permit. List each park's requirements beside the date you intend to visit, and keep the relevant reservations available without depending on mobile reception.
Rules can change between seasons. In 2026, Yosemite and Arches did not require general advance timed entry, while Rocky Mountain used specified seasonal windows. Those facts do not establish the rules for a future year. Recheck the actual park before booking, especially if a route depends on a narrow access window.
Grand Canyon: choose rim walking or a demanding descent
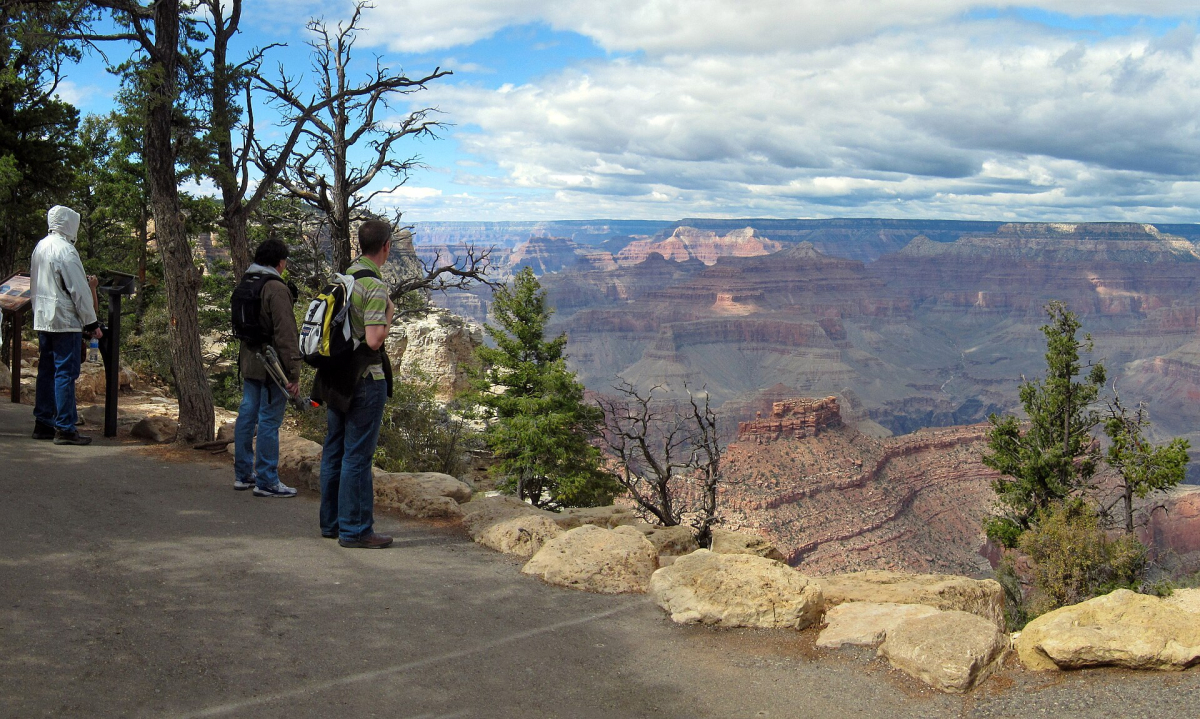
The South Rim provides a way to experience the canyon without committing to a major descent. Compare manageable sections of the Rim Trail and their access points before assuming that every Grand Canyon walk must go into the canyon. A rim-based visit also leaves room for stopping, interpreting the landscape and adjusting to weather rather than turning a first visit into an endurance test.
The NPS day-hiking guidance makes clear that routes into and out of the canyon are demanding. Going downhill first can disguise the effort still required to return. The park warns against attempting a rim-to-river-and-back day hike. Check trail closures and water availability; a marked water point on an older map is not confirmation that it is working during your visit.
Do not treat North Rim and South Rim as interchangeable stops. Access and services differ, and the park's 2026 information lists fire-related closures affecting several North Rim walks. Check the specific trail and approach road before moving a reservation there. If a closure removes the experience you wanted, alter the base or choose an available rim walk rather than assuming a nearby name represents the same visit.
The NPS lodging alert checked on 3 November 2026 says that overnight accommodations operated by park concessions have been halted since 31 August following waterline damage. Tusayan properties outside the park are unaffected by that closure. Confirm current lodging and route alerts; being able to visit a viewpoint does not establish that a particular lodge or inner-canyon route is open.
Yosemite: separate the Valley from high-country plans
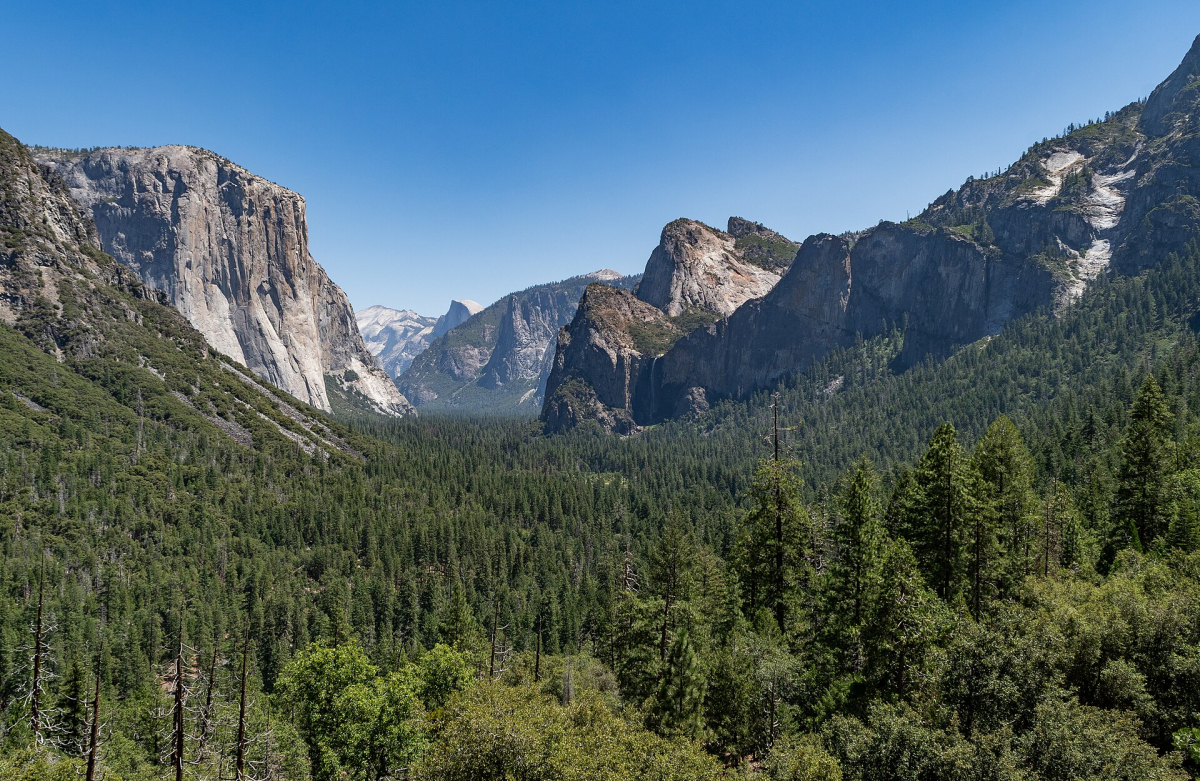
Yosemite offers different walking areas, including the Valley, Wawona and Mariposa Grove, Hetch Hetchy and Tuolumne Meadows. Choose the area that matches your access and the available season, then use the official hiking information to select a route. A photograph of a high-country trail does not mean that the road or trail is suitable on an early spring or late autumn date.
For a first visit with mixed walking ability, a Valley-based plan can reduce the pressure to cover every area. Group activities by their actual starting point and confirm the current shuttle or parking arrangement. For a longer or steeper walk, build a separate day with an earlier start and a clear turnaround decision. Do not add it casually after a full sightseeing morning.
Stay on designated trails and follow local water and food-storage instructions. Time spent checking the route at a visitor centre is part of a useful park day. When cloud, smoke or a closure changes the planned view, a shorter available walk may still offer a worthwhile visit; the aim is a coherent experience rather than collecting every landmark in one journey.
Yellowstone: boardwalks, wildlife and longer distances
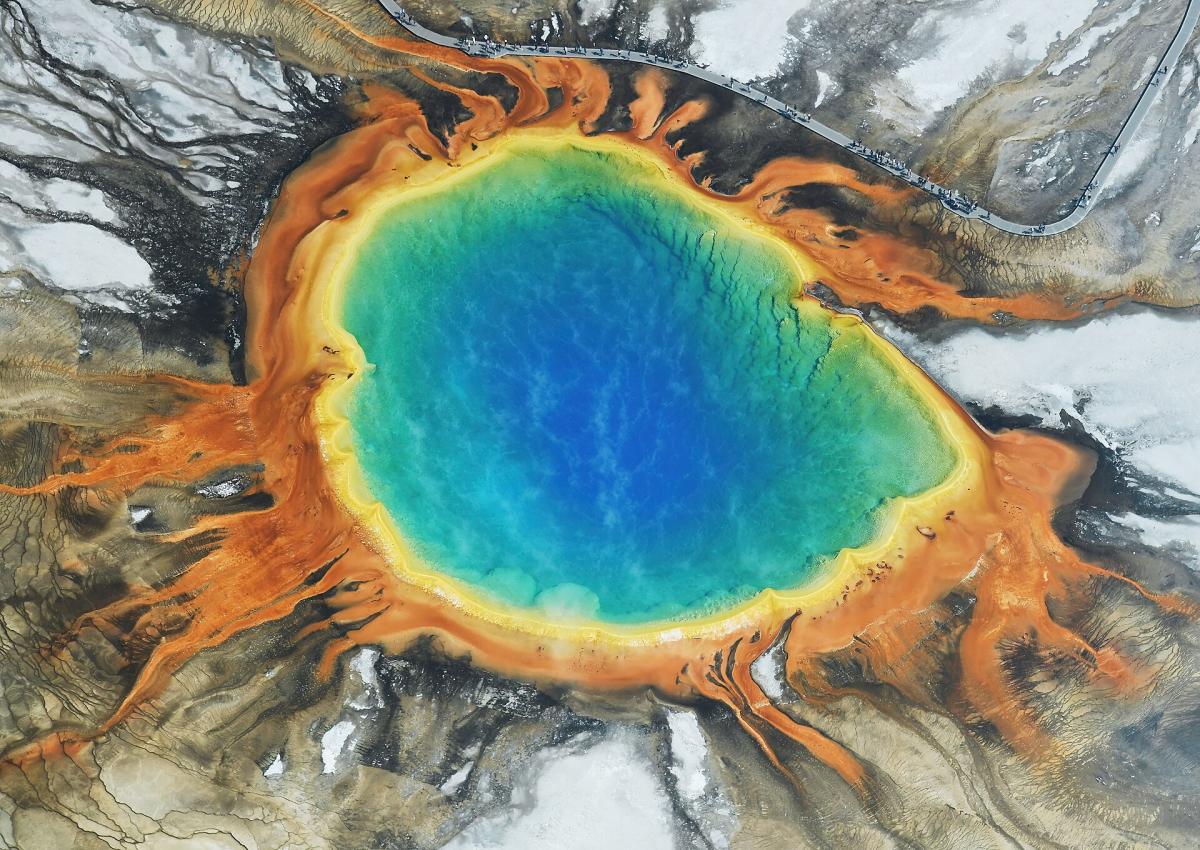
Yellowstone combines thermal landscapes and wildlife viewing with distances that reward careful base selection. Choose a few areas for each day instead of repeatedly driving across the park. Leave time for traffic and animals on the road, and avoid planning an essential distant connection immediately after a wildlife-viewing morning. Wildlife is a possible encounter, not a scheduled performance included in admission.
The park's safety rules require staying on boardwalks and designated trails around thermal features. Apparently solid ground can conceal dangerous hot water. Keep children close, do not touch thermal runoff and do not step off a boardwalk for a photograph. A short thermal-area walk still needs careful attention to the route and the people around you.
Use binoculars or a suitable lens rather than approaching animals. Yellowstone specifies at least 100 yards from bears, wolves and cougars, and at least 25 yards from other wildlife, including bison and elk. Move back when an animal approaches, and follow ranger instructions. For backcountry plans, review the park's bear, food-storage and equipment guidance for that activity rather than borrowing a generic city-day packing list.
Great Smoky Mountains: forest walking and parking planning
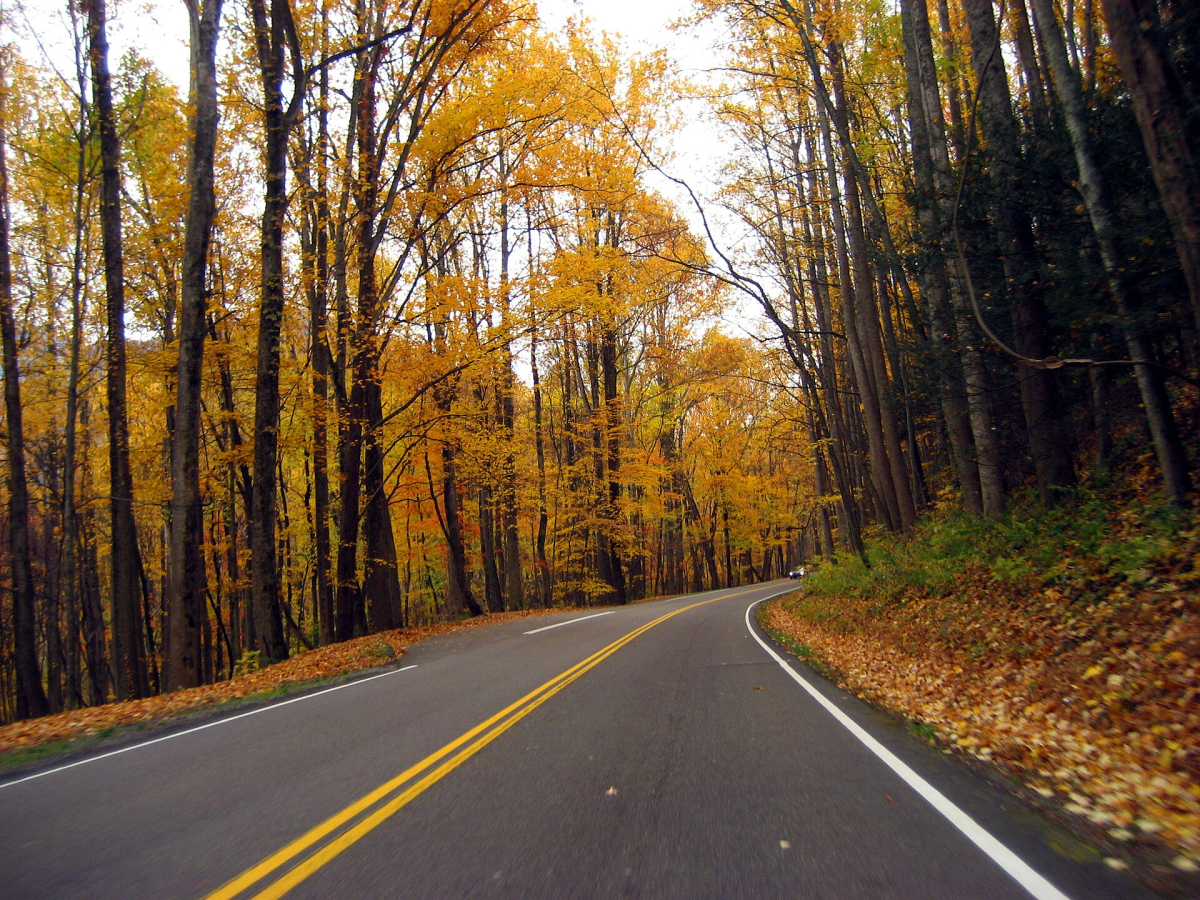
The Smokies offer a different walking setting from the desert and thermal parks: wooded slopes, stream valleys and mountain viewpoints. Choose a route and starting point that suit the road approach and your return base. A scenic drive can help introduce the landscape, but a long queue for a popular area can leave less time for the walk than expected. Keep a second suitable trail in the same general part of the park.
Check the parking-tag rules before travelling. A tag is required for parking longer than 15 minutes. Posted choices are $5 daily, $15 weekly and $40 annually; an America the Beautiful entrance pass does not replace the tag. The physical display requirement and the licence-plate match matter, especially when collecting a rental car close to the visit.
A parking tag does not reserve a space. Confirm how you will obtain and display it before reaching a trailhead without a sales machine. For forest walks, check trail and weather alerts and prepare for wet or uneven surfaces. Avoid comparing difficulty solely by distance with a paved urban walk, and leave time for the climb and the drive back.
Prepare for the conditions you may meet
Use the NPS Ten Essentials as a starting framework, then adapt the equipment to the actual walk. Navigation, suitable clothing, lighting, food, water and emergency supplies need to work when a short outing lasts longer than intended. Know how to use the items you carry and check local fire rules rather than assuming that carrying a fire starter permits its use.
Check heat, thunderstorms, smoke, snow and road access at the relevant location. A forecast for a nearby city may not describe a high trail or canyon floor. Start with a plan that can be shortened, take local closures seriously and turn around when the conditions exceed your preparation. Saving a difficult route for another visit is a sound planning decision.
Continue planning your USA trip
Sources and further reading
- NPS app
- NPS nonresident fees
- Yosemite reservations
- Arches planning
- Grand Canyon hiking
- Yosemite hiking
- Yellowstone safety
- Smokies parking tags
- NPS Ten Essentials
- Grand Canyon lodging alert checked 3 November 2026
FAQ
Does a national-park annual pass include every reservation?
No. Entrance coverage, timed entry, campsites, controlled hikes, parking tags and commercial activities can be separate. Check each park and activity for your actual travel dates.
Is the same annual-pass price available to every visitor?
No. The 2026 system distinguishes resident eligibility and a $250 nonresident annual pass. Additional nonresident charges also apply at designated parks unless covered by a qualifying pass.
Can I walk to the Colorado River and back in a day?
Do not build a holiday around that plan. Grand Canyon National Park warns against rim-to-river-and-back day hikes. Choose a suitable rim walk or a properly planned shorter descent within your experience.
Does a Smokies parking tag guarantee parking?
No. It meets the applicable parking-tag requirement for the vehicle but does not reserve a space. Check the display rules, actual starting point and alternative trailhead before arriving.