
Sign in
For Photos4Travel editors and team members.
Oʻahu · Photography
Lanikai Beach Photography on Oʻahu: Shoreline and Offshore Islands
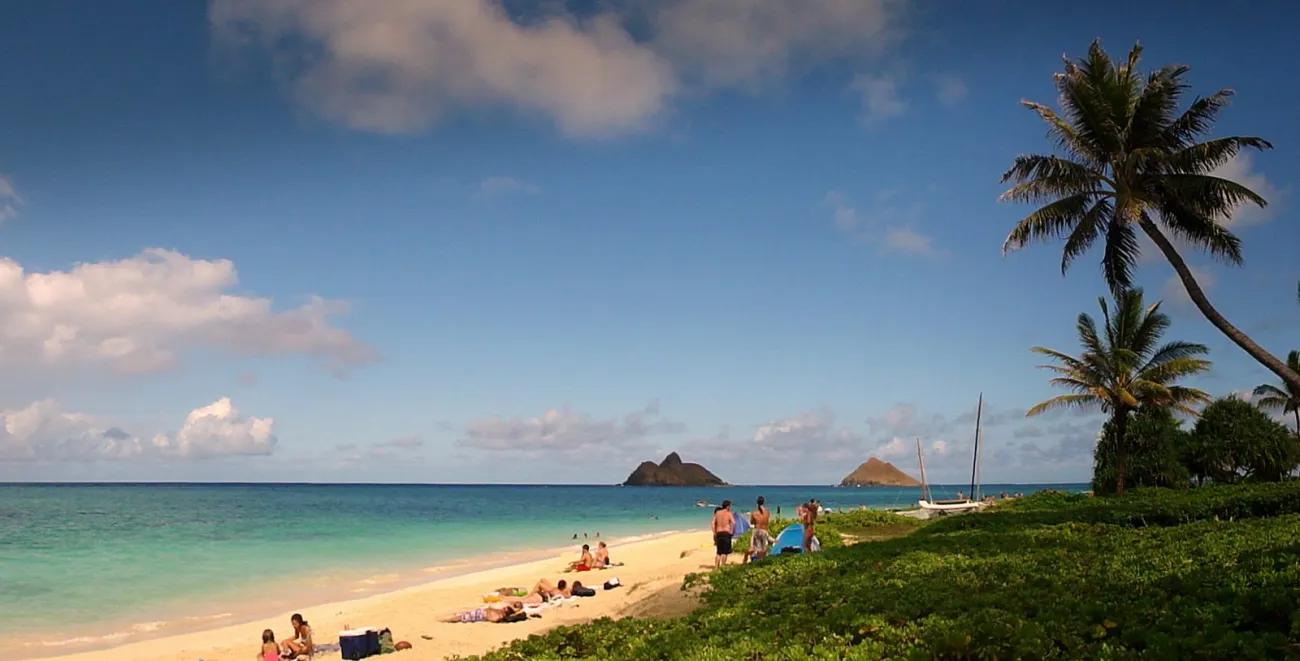

Cristo Vlahos’s Lanikai photograph builds its composition around a diagonal beach, palms and the two Mokulua islands offshore. The pale sand and turquoise water establish a windward Oʻahu setting, while people along the shore show that this is a shared beach rather than an empty landscape. Use it as a study of relationships in the frame, not a promise of an uncrowded visit.
Choose what the shoreline photograph is about
The beach enters from the lower left and narrows towards the right. That diagonal connects foreground activity with the offshore forms. Palms frame the right edge, while the horizon leaves room around the islands. A tight crop might show the islands more clearly, but would lose the connection with the beach that gives this reference its setting.
Begin with one visual relationship: land against water, a shoreline curve, a change in surface or the way vegetation frames the coast. A wider view can establish the setting, while a more selective frame can make that relationship easier to read. Avoid including several competing subjects simply because they fit in the camera.
Look at the edges before taking the picture. A partial tree, bright object or tilted horizon can distract from the coast you intended to show. Adjust the composition from the permitted position. There is no need to step onto a wall, a fragile planted area or a closed track to tidy the frame.
Keep the location within what can be verified
The source identifies Lanikai Beach on Oʻahu’s windward coast. It does not identify the photographer’s exact standing point, parking place or route to the beach. Those details need their own evidence. Choose a lawful public approach, obey posted parking restrictions and do not block driveways or cross private gardens.
Water colour cannot establish safe swimming or a suitable crossing to the offshore islands. Treat any water activity as a separate decision with current local guidance and the relevant access rules. Plan the coastal outing using Map & Islands and the beaches guide, then verify local conditions.
Make one coast the focus of the day
Give a coastal outing time for traffic, legal parking and a slow look at the available light. Crossing the island repeatedly for several imagined sunrise or sunset views can consume the day. A local route with an alternative nearby is more flexible if a shower, road restriction or busy parking area changes the plan.
Check the National Weather Service forecast for the area you will actually visit. Weather at the accommodation may differ from the coast or higher ground ahead. A clear photograph made on another date is a reference for composition, not a forecast.
Follow signs, leave natural material in place and ask before close portraits. The best caption identifies the island and subject confidently, then stops where the evidence stops. Our Hawaii Photo Spots guide offers named alternatives when you need a fully defined photographic outing.
Frequently asked question
Does the photograph mean I can safely paddle to the offshore islands?
No. The reference cannot establish current sea conditions, suitability or access rules. Check those separately and do not treat an attractive view as activity advice.