
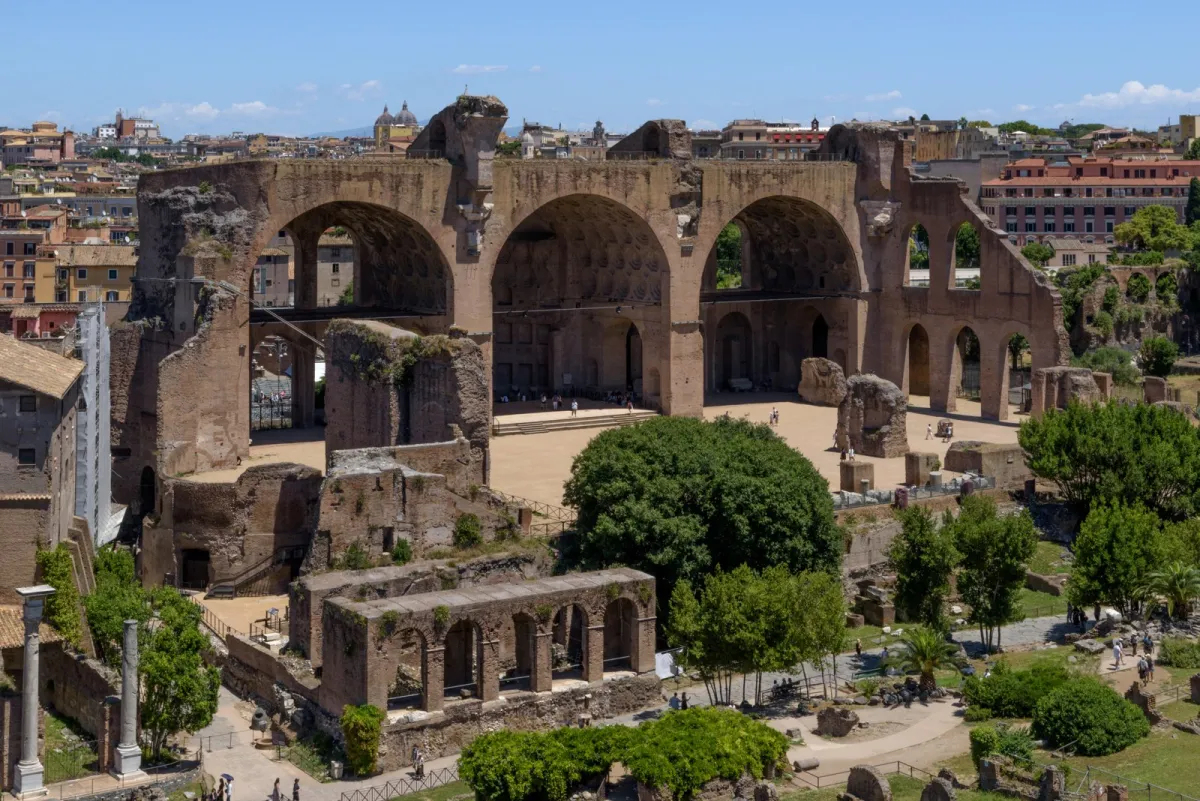

This guide helps you choose photo spots, read the six photographs below and organise a workable route. The individual location guides develop particular landmarks in more detail. For museum tickets and sightseeing priorities, use the Rome attractions guide; for the wider holiday, start with the Rome Travel Guide.
Choose a Rome photo area for the pictures you want
| Where to go | What to photograph |
|---|---|
| Colosseum, Forum and Capitoline. Best suited to a day built around an archaeological visit and its actual admission time. | Arches, columns and brickwork. Alternate a broad setting with a close detail; allow for uneven ground. |
| Pantheon, Trevi and Navona. A practical first walk, with different subjects in a connected central area. | Fountain sculpture, portico rhythms and open squares. Choose your main stop before crowds set the pace. |
| St. Peter’s and the Tiber. Choose a compact river walk and one place to finish around dusk. | Facade symmetry, bridge sculpture and the dome in the skyline. Give changing light enough time at your final stop. |
| Trastevere and Ostiense. Choose a neighbourhood session and give each area its own time on the itinerary. | Street textures and public life in Trastevere; industrial form around Ostiense’s Gazometro. Look at the surrounding streets as well. |
| Villa Adriana, Tivoli. Set aside a separate outing with admission, opening hours and return transport arranged. | Water, reflections and archaeological landscapes. Assess the wind and surface of the Canopus pool when you arrive. |
Ancient Rome: build depth from arches, columns and ruins
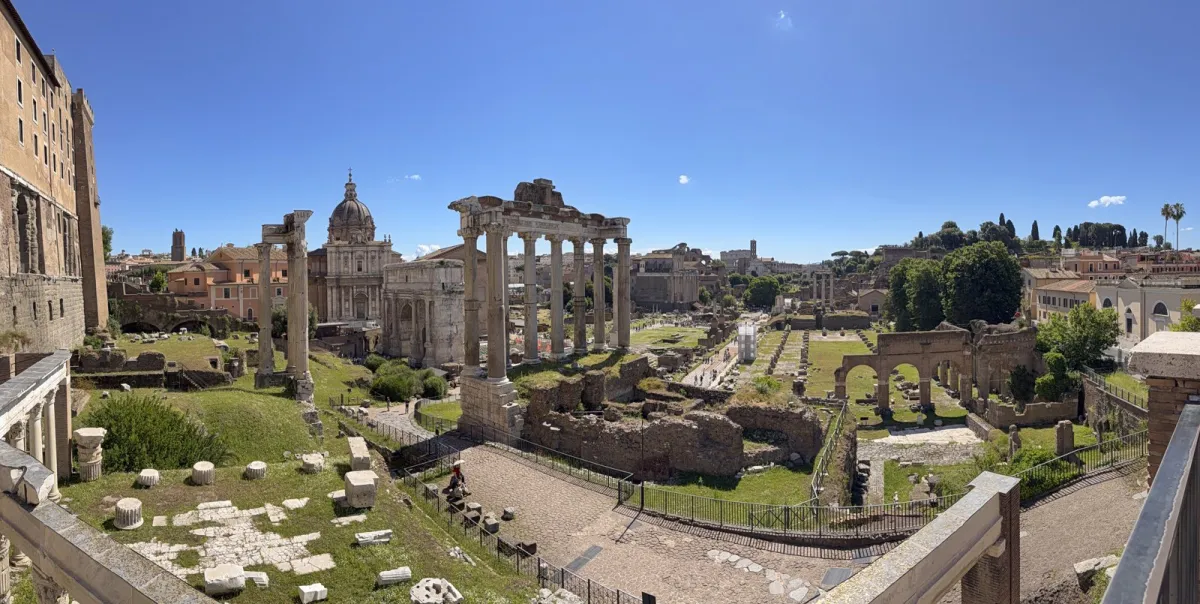

The Forum panorama shows why a clear subject matters here. Low walls, upright columns and modern buildings can compete in the same frame. Begin with one dominant structure, then use the surrounding ruins to explain its scale. The hero photograph above makes a different choice: the surviving vaults of the Basilica of Maxentius dominate the view.
Colosseum and the Arch of Constantine
For the Colosseum, alternate a wider exterior view with a closer study of the repeated arches. Keep the building’s edges clear of distracting poles and signs where your permitted position allows. A person moving through the scene can communicate scale. The Colosseum photo guide develops exterior framing and the difference between daylight and illuminated views.
The Arch of Constantine offers a more concentrated subject nearby: start with the full outline, then choose one relief or opening. Compare the arch against the larger amphitheatre before deciding whether both buildings belong in the same picture. Keep pedestrian circulation clear while changing position.
Roman Forum and the Palatine
Temple columns work well as vertical elements against the lower archaeological landscape. Check whether a column overlaps another building awkwardly; a small change of position on the open visitor path may create a clearer separation. A closer composition can be stronger than an attempt to fit every ruin into one photograph.
At the Basilica of Maxentius, compare the immense vaults with the smaller structures around them. The park’s monument description provides the historical context. Use the shadow within an arch as part of the composition and check that bright masonry retains detail.
The Palatine adds elevation changes and a broader archaeological landscape. Plan photographs along the route available with your ticket, with pauses for shade and footing. The park’s visitor guidance describes uneven surfaces and historic steps; remain on open, marked paths when looking for a viewpoint.
Capitoline Hill and the Vittoriano area
Campidoglio suits a study of the relationship between paving, facades and the space of the square. Start with the arrangement of the buildings, then choose a statue, doorway or architectural rhythm. This gives your sequence a change of scale after the Forum’s wider landscape.
The Vittoriano introduces bright pale surfaces and a much larger monumental facade. Expose carefully for the stone in strong sun. Choose an outdoor composition first; if you want an elevated or interior visit, check its separate admission and access arrangements through the attractions guide.
The historic centre: fountains, squares and architectural detail
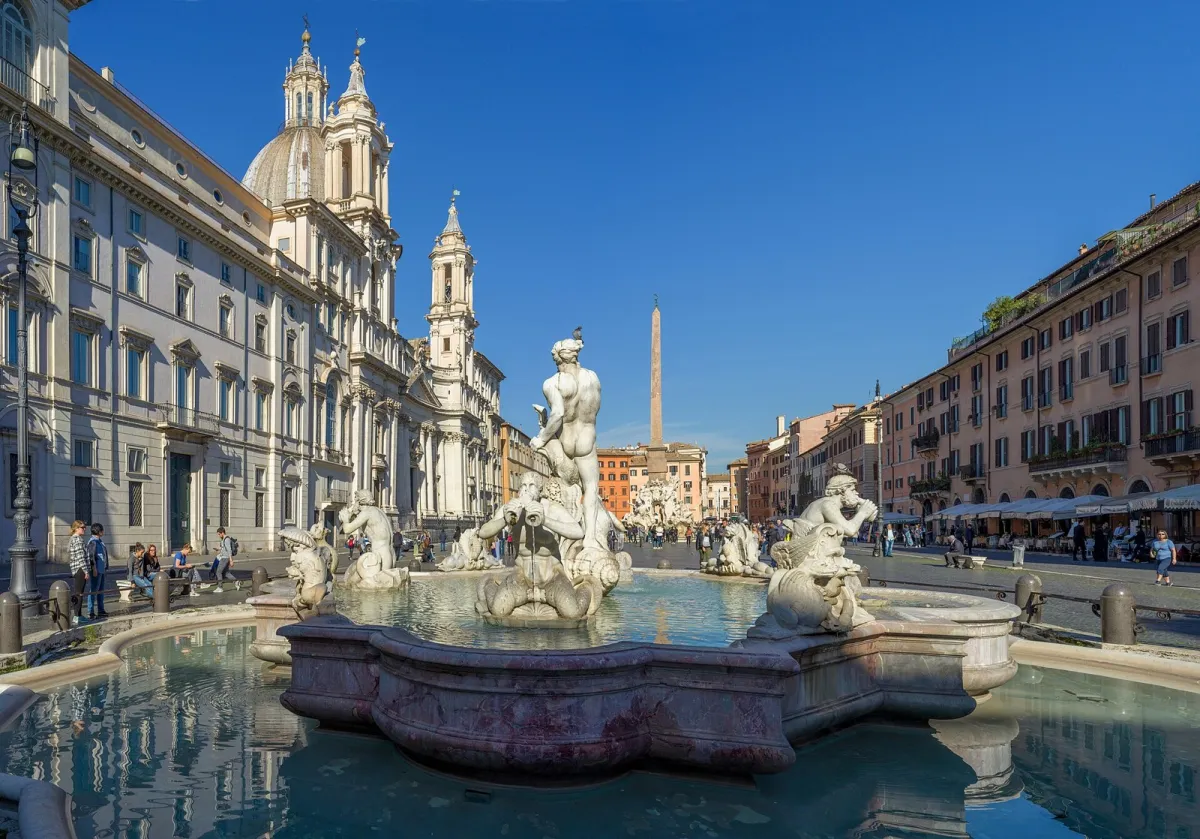

The photograph shows the Fontana del Moro at the southern end of Piazza Navona. Its sculpture provides a foreground subject while the surrounding facades establish the setting. This is a useful pattern for a central Rome photo walk: one recognisable object, a considered background and enough space to understand the square.
Piazza Navona: show the square as well as the fountain
Choose between a fountain detail and a wider view along the square’s elongated form. Watch the edges of the frame for clipped figures, umbrellas and overlapping heads. The Piazza Navona photo guide compares sculpture, background and the shape of the public space.
Pantheon and Piazza della Minerva
The Pantheon’s portico creates strong repetition and deep shade, while Piazza della Rotonda supplies street activity and a foreground fountain. Decide whether your subject is the full facade, the columns or the square in use. Use the Pantheon photo guide for those choices, and arrange any interior visit separately.
At Piazza della Minerva, the elephant and obelisk provide a compact vertical subject. Leave breathing room above the obelisk and look for a background that separates the sculpture from the surrounding buildings. This is a natural detail stop on a Pantheon walk.
Spanish Steps and Piazza di Spagna
From the square, study the relationship between the fountain, staircase and church above. A wide view explains the setting; a tighter composition emphasises the stair’s curves. Keep the stairs and approaches clear while photographing. The Spanish Steps photo guide examines the view from Piazza di Spagna.
Trevi Fountain: decide how close you need to be
The facade, central sculpture and moving water support several different photographs. Choose a wider architectural image or a close sculptural detail before joining an access queue. According to Rome’s official tourism service, a €2 ticket for the closest basin area was introduced on February 2, 2026. Check current conditions and exemptions before visiting; this arrangement concerns the close-access area. The Trevi photo guide explains framing and the access distinction.
St. Peter’s and the Tiber: choose a facade study or a river skyline
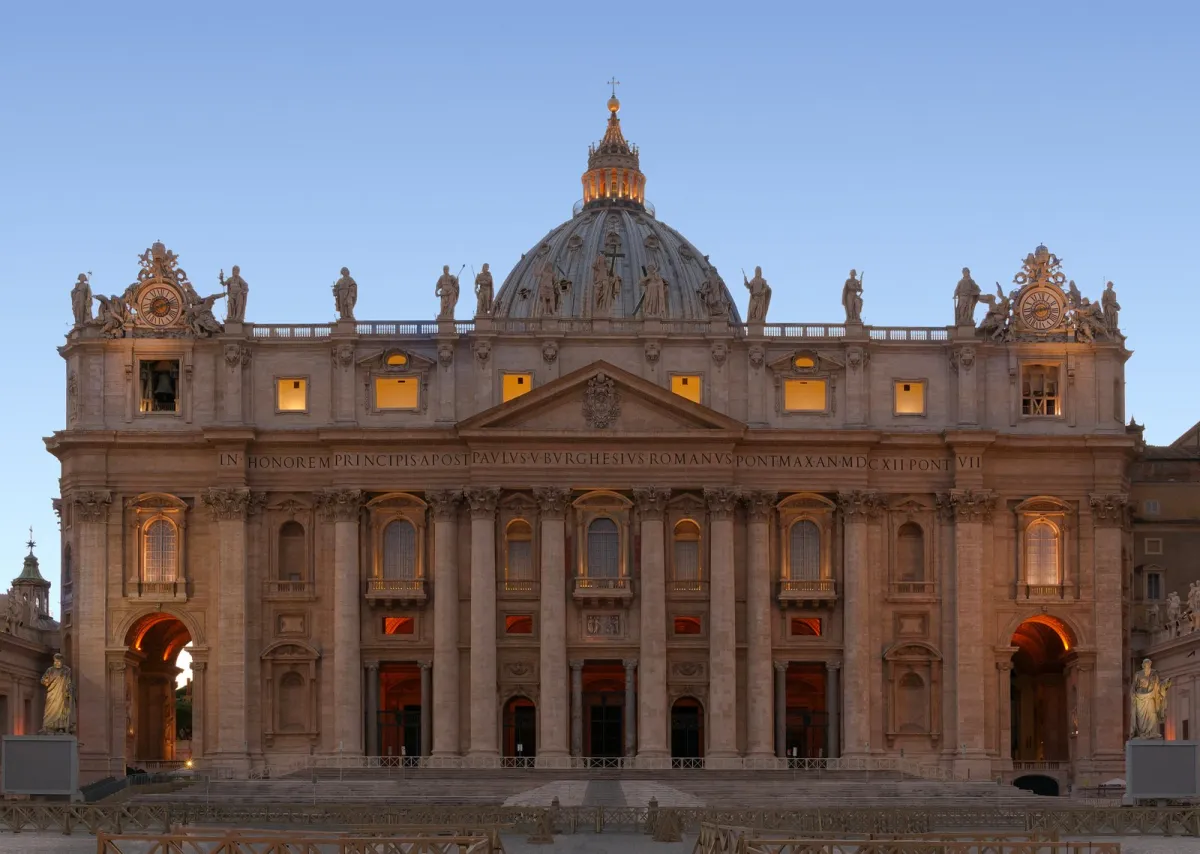

The blue-hour photograph concentrates on St. Peter’s facade: warm illumination, repeated columns and a blue sky create a balanced architectural study. A river photograph tells a different story by placing the dome among bridges and the wider city. Choose your evening finish around one of these subjects so that the changing light has your full attention.
St. Peter’s Square and Via della Conciliazione
St. Peter’s Square offers broad views and the repeated forms of the colonnade. For a wide composition, check the balance between the open square and the architecture; for a detail, isolate a short rhythm of columns.
The dome changes its relationship to the facade as you move through the square and surrounding streets. Notice how much of it is visible before deciding where to frame the picture.
The basilica facade suits a more symmetrical approach, as in the image above. Keep verticals as upright as practical and look at the complete frame before adding a close-up.
Via della Conciliazione provides an axial approach towards the basilica. Compose from a safe pedestrian position and let the street explain the approach. The Vatican photos and art guide brings together St. Peter’s, the Gallery of Maps, Raphael and Michelangelo; it also distinguishes outdoor photography from museum and chapel rules.
Piazza del Risorgimento is a useful orientation point on the Vatican side of the city. Check the route to the entrance you actually need: the museum entrance and the basilica approach are different destinations. Keep your main photo stop within the part of the area you plan to visit.
Castel Sant’Angelo, Ponte Umberto I and the Palace of Justice
Ponte Sant’Angelo lets you compare bridge sculpture with the castle behind it; the Castel Sant’Angelo photo guide develops these subjects. For a wider skyline, Ponte Umberto I is identified by Turismo Roma as a place to see Ponte Sant’Angelo and St. Peter’s dome together. Use the pedestrian space and leave a clear passage.
The Palace of Justice gives this river walk a large, detailed facade to contrast with the dome and bridge views. Decide whether to show its full scale or a small section of the ornament. Bridge-level streets offer a practical way to compose without adding a descent to a lower river path.
Neighbourhood photographs: Trastevere and Ostiense
Trastevere: build a street sequence
Try three complementary pictures: a street showing the neighbourhood’s scale, an architectural detail and a scene of public life. Doorways, shutters and changes of surface can supply detail without turning every frame into a wide street view. Give residents room to use entrances and ask before making someone the clear subject of a close portrait. The Trastevere photo guide develops street and evening-light choices.
Around Piazza di Santa Maria in Trastevere, use the square to show how buildings and public activity relate. Keep worshippers and service times in mind around the church. Combine a short photo session with a meal or a rest rather than waiting in one position for a permanently empty square.
Ostiense: industrial form around the Gazometro
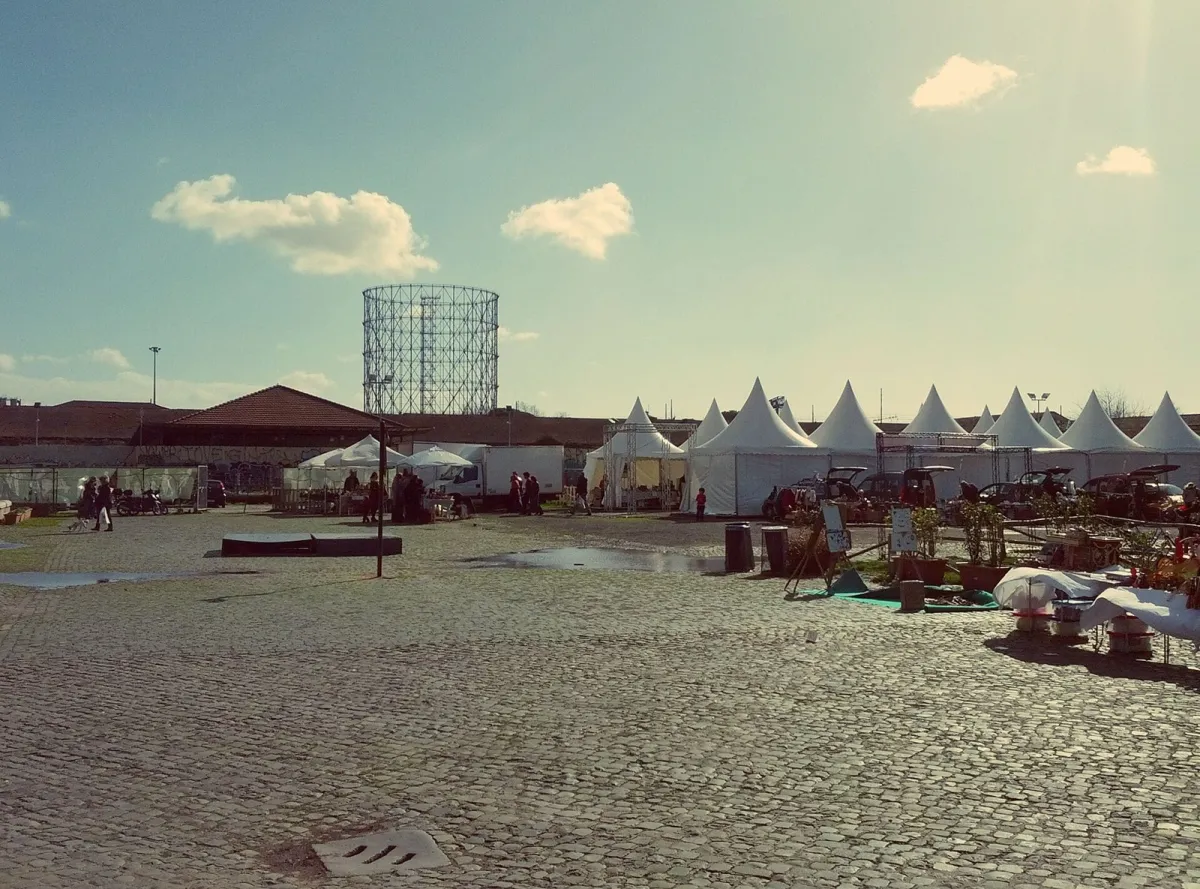

The Gazometro is in Ostiense. Its open steel framework supplies a different subject from Rome’s stone monuments. In this photograph, the structure sits beyond a cobbled foreground and temporary event tents; those tents describe the photographed moment. For your own visit, look for the relationship between the framework, sky and surrounding streets from places open to pedestrians.
Give Ostiense its own neighbourhood session. Choose a public street view on arrival and follow any current site-access notices. The framework can work as a silhouette, a repeated pattern or part of a wider urban landscape. Use the Rome map and neighbourhood guide to place it within the city before planning the journey.
Beyond Rome: reflections and ruins at Villa Adriana
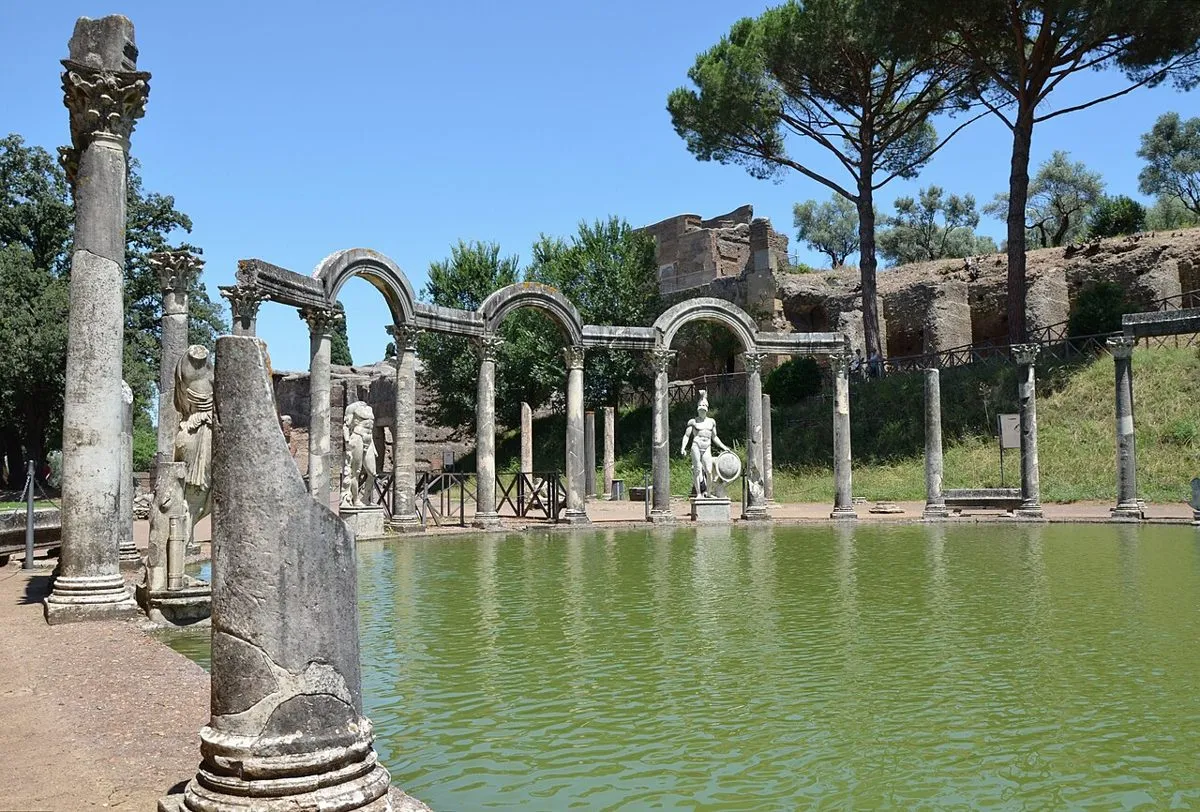

Villa Adriana: compose around the Canopus
The Canopus photograph brings water and a line of architectural elements into the same frame. Begin with a clear choice: make the pool the leading element, or give more space to the colonnade and its reflection. Wind and light change the water’s appearance, so assess the scene rather than expecting a mirror-like surface.
Villa Adriana is near Tivoli and belongs to a separate outing. Check the official Villae visitor information, opening calendar and the return journey before choosing a late photo session. The Rome day-trips guide handles transport planning; the Villa Adriana photo guide concentrates on reflections, ruins and photographic choices.
Two Rome photo walks you can adapt
Historic-centre walk: Spanish Steps → Trevi → Pantheon → Navona
Start with the staircase and square at Piazza di Spagna, continue to Trevi, then move to the Pantheon and nearby Piazza della Minerva before finishing at Piazza Navona. Give each stop a different role: a wide setting, a sculpture detail, an architectural rhythm and a square in use.
Our planning allowance is two to three hours for a relaxed outdoor photo walk, excluding meals, interior visits and access queues. This is an editorial allowance, not a measured walking time. Shorten the route to Pantheon–Minerva–Navona when you want more time at each stop. Use the historic-centre walking route for orientation.
River walk: Piazza Navona → Ponte Umberto I → Castel Sant’Angelo → St. Peter’s
Begin with a fountain composition at Navona, reach Ponte Umberto I for the wider river setting, then continue towards the castle and the Vatican approach. Allow another two to three hours for photographs and connecting walks, with additional time for a castle, museum or basilica visit. Choose one final subject for dusk and check the season’s sunset time before setting out.
For an archaeology day, build the Forum and Palatine session around your reserved visit and add a nearby exterior stop. For a longer itinerary, use the Rome itineraries guide to spread these areas over several days.
Work with Rome’s light and keep equipment manageable
- Early or late daylight: look for side light that gives columns and brickwork depth. Check the actual direction and the subject’s shadows when you arrive.
- Strong midday sun: try portico shade, a tighter sculpture study or patterns on a facade. Watch bright stone and dark arches in the same frame.
- Overcast light: use the softer contrast for details and street scenes. A close composition may need less sky.
- Blue hour: choose a settled position before the light changes. Keep the camera steady and review bright lamps as well as the darker building.
A phone or a camera with one versatile lens can cover these walks. Clean the lens, carry a spare battery or power bank and protect equipment from rain. For a phone at dusk, brace your hands and let night mode finish before moving. With a camera, choose a shutter speed that suits movement in the scene; a slower exposure that blurs pedestrians is a creative choice requiring a stable camera.
Use the best-time-to-visit guide for seasonal walking conditions. Shorter daylight, heat and rain affect how much of a route is comfortable; a promising photograph is easier to make when the day leaves room for breaks.
Photography rules, access and practical checks
For the Vatican Museums, the official visitor rules allow personal photography in most areas without flash, while photography and filming are prohibited in the Sistine Chapel. Tripods, selfie sticks and professional equipment have additional restrictions. Check the current rules of each venue before packing equipment for an interior visit.
Plan a shoot involving a crew, models, substantial equipment or commercial use directly with the relevant site. Villae publishes photographic permission information for its properties. Ordinary visitor access and permission for a planned production are separate checks.
Stay behind barriers, keep doorways and pedestrian routes open, and handle bags carefully in crowded places. Cobblestones, steps and changes of level affect a camera walk; check the Rome accessibility guidance when selecting a route. Choose a safe place to stop before reviewing photographs.
Questions before a Rome photo walk
Which route suits a first visit?
The historic-centre route combines several different subjects in one connected area. Choose the river route when bridges, skyline and St. Peter’s matter more to you. Give the Colosseum and Forum their own visit block.
Can I photograph all of these places in one day?
Pick one main area and an optional nearby evening stop. Trying to include the historic centre, Vatican, Ostiense and Tivoli in one day leaves little time to look carefully. Villa Adriana needs a separate outing.
Do I need a tripod?
Many daytime photographs and some evening photographs are practical handheld. A tripod can help with deliberate long exposures, but carrying one adds weight and requires checking venue and location rules. Start with the pictures you want to make, then choose the equipment.
Choose your next location guide from the links above, or use Getting Around Rome to connect your photo walk with your accommodation and the rest of the day.