
Sign in
For Photos4Travel editors and team members.
Peru · Photo Spots
Peru Photo Spots: Where to Stand, When to Go and What to Book
The photograph you want should influence the visit you book. At Machu Picchu, the permitted route determines the views you can reach. In Lima and Arequipa, a few metres of movement around a public square can change the relationship between a fountain, a façade and the people passing through. On Taquile, a good portrait begins with permission rather than a long lens.
Use these seven stops as practical starting points, not a promise of empty locations or uninterrupted access. Light suggestions describe photographic choices; the weather, season and actual opening arrangements still govern the day. Do not book a dawn journey unless the site or transport really admits visitors at that hour. Keep enough time after the photograph to follow the required route and make the return connection.
Choose the photograph before the time slot
On smaller screens, swipe or scroll horizontally to read the full table.
| Stop | Starting point | Useful photographic choice | Main constraint |
|---|---|---|---|
| Machu Picchu | Authorised viewpoint on your booked route | Citadel terraces with Huayna Picchu behind | Ticket route and timed entry |
| Cusco, San Blas | Plazoleta San Blas, then the upper public viewpoint | Roofscape, hills and changing evening light | Steep streets, steps and altitude |
| Arequipa | South side of Plaza de Armas | Cathedral across the square, with fountain or arcade | Public events and separate interior access |
| Lima, Plaza Mayor | Public west side of the square | Cathedral and fountain; a second frame toward Government Palace | Security barriers and ceremonial closures |
| San Isidro, El Olivar | Calle La República beside the cultural centre | Olive trunks, pathways and pond reflections | Stay on permitted paths and respect residents |
| Taquile | Agreed landing and village meeting point | Lake-and-terrace view; a separately agreed portrait | Boat return, steep paths and consent |
| Nasca Hummingbird | Confirmed airfield meeting point | Aerial geoglyph through the aircraft window | Carrier authorisation, weather and the actual flight plan |
Machu Picchu: match the circuit to the view
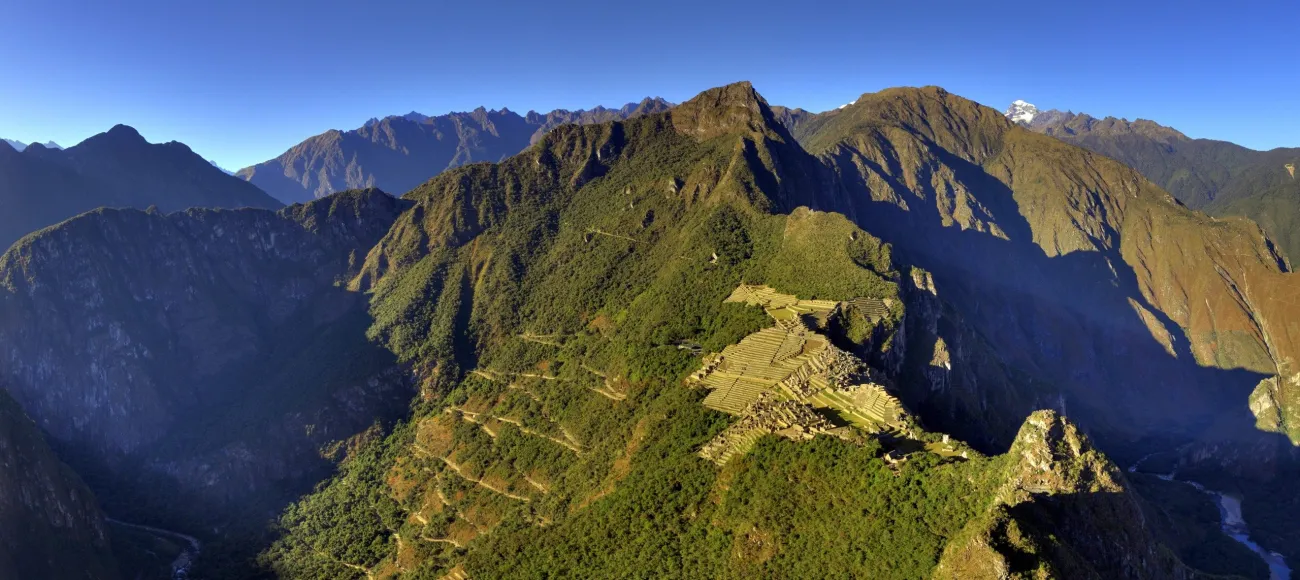

The photograph above looks down from Huayna Picchu. Check the mountain route and climb requirements if you want that perspective. For the familiar terrace composition with Huayna Picchu behind, compare the classic route maps before booking.
For the familiar composition, look for an authorised view over the citadel terraces with Huayna Picchu rising behind. The higher panoramic views and the viewpoints on the classic routes are related but not identical. A route through the lower sectors should not be bought on the assumption that you can simply climb to every viewpoint afterward. Match the actual route map to the photograph you want before paying.
Start with the Machu Picchu ticket and circuit guide, then check the route currently sold through the Ministry of Culture ticket platform. A named route, date and entry hour are more useful than a reseller's broad description of a “Machu Picchu ticket”. The site entry, rail journey and shuttle are separate pieces of the visit.
When you reach a permitted viewpoint, take one wide frame, then simplify the composition around terraces, masonry and the mountain. Keep railings, queues and other visitors in mind before moving your feet. Cloud can hide the mountain or reveal it in short intervals; leave room for that possibility within the permitted visit rather than trying to reverse the one-way flow. Do not step onto walls or cross a barrier for a clearer foreground.
A very early entry is not a guarantee of sunrise or a cloud-free background. Book an hour that works with your actual transport and overnight base. Carry only the equipment allowed by current rules, and check restrictions on tripods, poles, drones and professional work before departure. Photograph within the route you bought, then leave enough time to descend and reach the correct return train.
Cusco: climb to San Blas without rushing the altitude
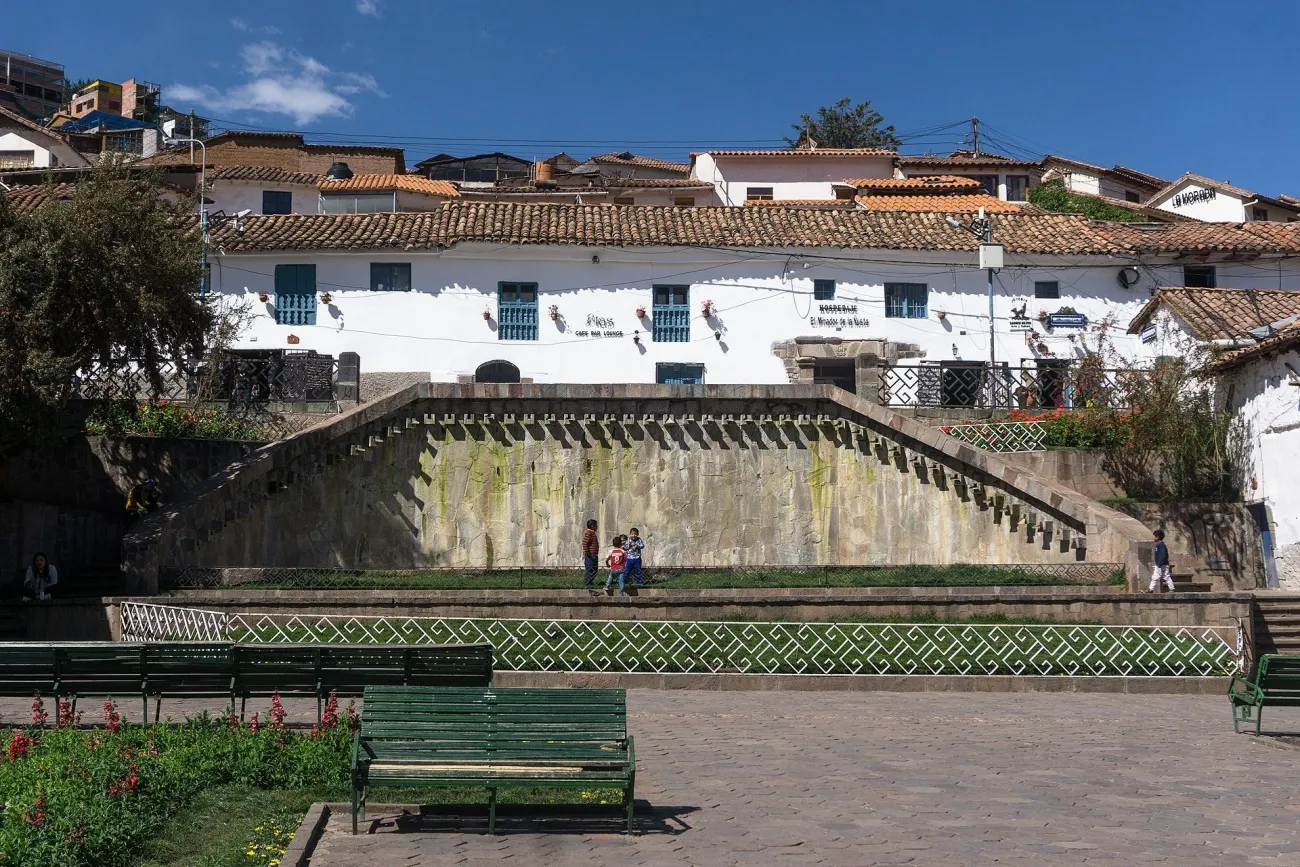

Begin at Plaza de Armas and follow the pedestrian approach through Hatun Rumiyoc and Cuesta de San Blas to Plazoleta San Blas. This is an uphill outing with uneven paving, not a level extension of the main square. Use the plaza as the first stop for a street-and-church composition, then continue toward the upper viewpoint only if you are comfortable with the ascent.
From the plazoleta, use the stepped Pasñapakana approach toward the public Mirador de San Blas, also called Qosqo Qhawarina. Stand within the viewpoint's public space and look across the tiled roofscape toward the city and surrounding hills. Include a short stretch of roof or wall in the lower frame to give the distant city scale. PROMPERÚ introduces San Blas and its viewpoint; a University of Barcelona study of the neighbourhood documents the Pasñapakana approach and viewpoint.
Allow a slow walk with pauses rather than timing the climb as a race from the centre. Late afternoon gives you the option of changing sky and city lights, but photograph the street details in daylight first. Carry a layer and arrange a sensible return before it becomes dark. If the descent, steps or weather are unsuitable, stop in the lower plaza and make a more intimate picture of the architecture instead.
Arequipa: photograph the cathedral from across the square
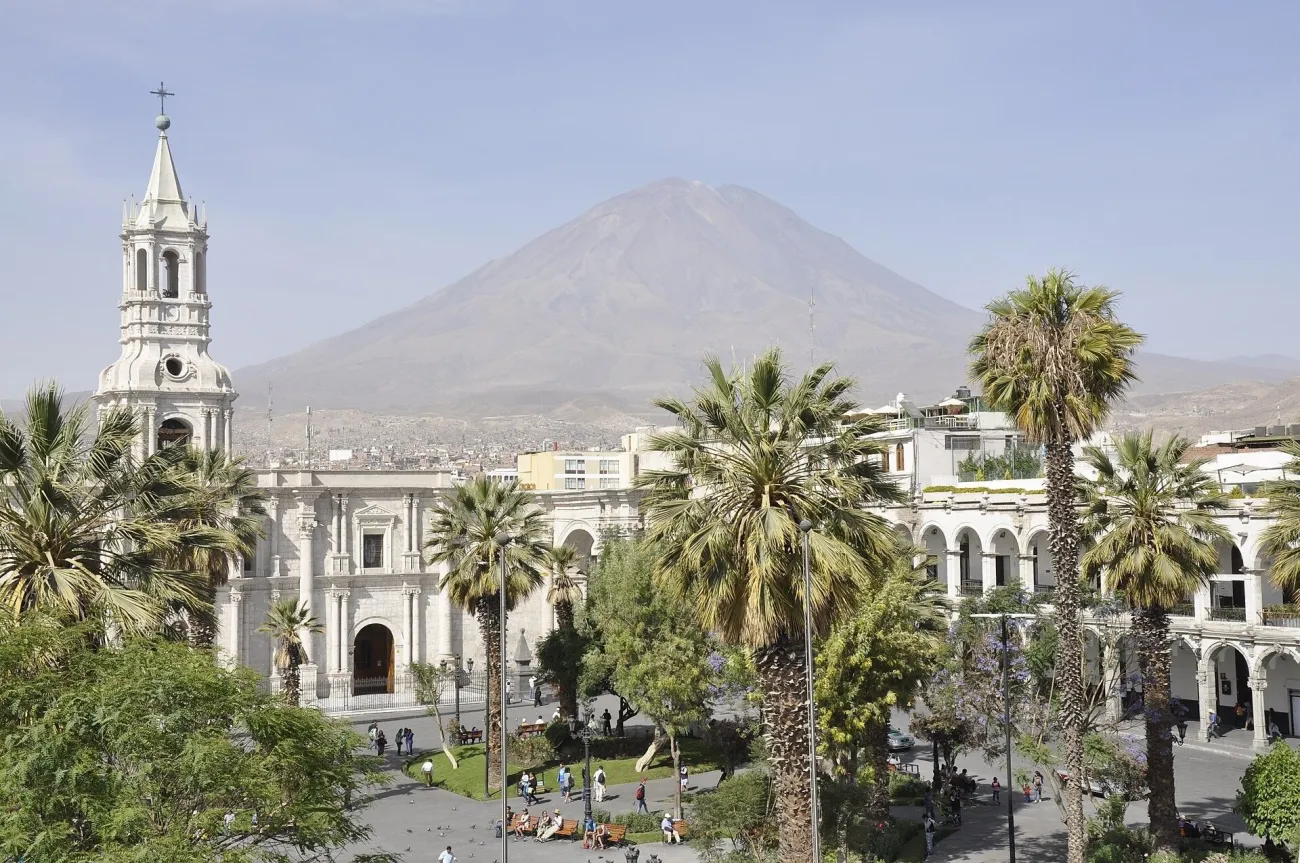

The photograph above uses an elevated viewpoint. For a public ground-level starting point, stand on the south side of Plaza de Armas, opposite the cathedral, and look north across the square. Position the central fountain slightly off-centre if you want a foreground element, or move to a clear public section for a straighter architectural frame. The arcades can provide a frame-within-a-frame, but do not block restaurant entrances or assume that an upstairs business is a free public viewpoint.
The municipal tourism guide identifies the square, its arcades and the cathedral's sillar construction. For a first photograph, concentrate on the relationship between the long façade and the space in front. Then look for smaller details in the volcanic stone. Keep the camera level when possible to reduce converging verticals rather than relying on an extreme upward angle.
Morning or late-afternoon side light can reveal texture; the period around dusk can work for a different balance of sky and building illumination if access and conditions allow. Neither requires entry to the cathedral. Interior, museum and tower visits have separate arrangements, and religious services take priority over photography. Ask about flash and equipment before entering. Return to a staffed place for dinner or your arranged pickup rather than extending the session into an unfamiliar quiet street.
Lima: use Plaza Mayor's fountain and surrounding façades
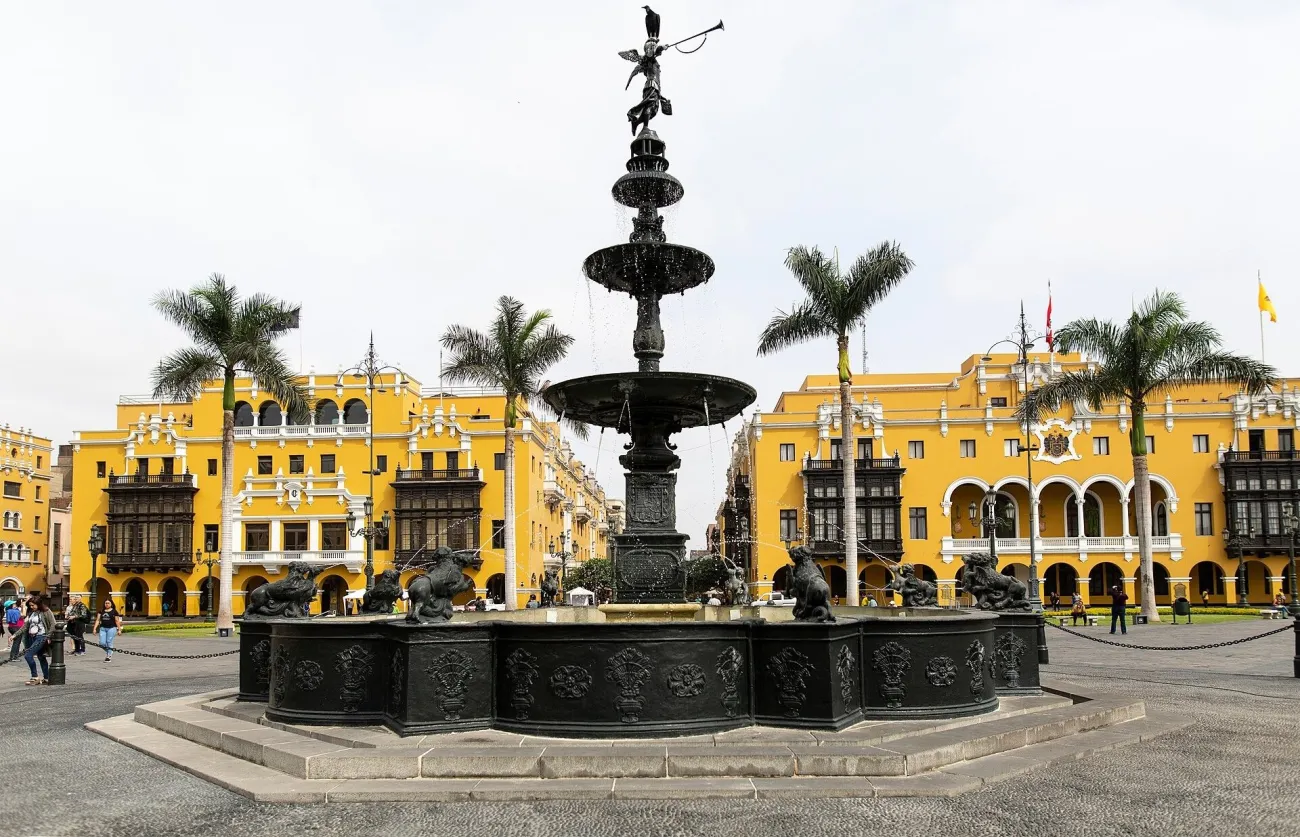

A useful walking start is Plaza San Martín, continuing along Jirón de la Unión toward Plaza Mayor when the route is open. For a simpler arrival, arrange a drop-off at an accessible point in the historic centre and follow current pedestrian directions. Do not ask a driver to cross a security barrier to reach the exact middle of a map pin.
On the public west side of Plaza Mayor, face the cathedral across the square and decide whether the fountain helps or distracts. Move a few steps to separate its shape from the building behind. Turn north for a different view toward Government Palace. MINCETUR's Plaza Mayor inventory gives the approaches from Plaza San Martín and the Jirón de la Unión Metropolitano station, while PROMPERÚ identifies the surrounding buildings.
Soft overcast light can suit the coloured façades and details; a grey sky does not make the visit unsuccessful. Use less sky in the frame and concentrate on balconies, paving and people moving through the public space. Access can change for official events or security reasons. Follow instructions, photograph only from permitted areas and arrange the return to your accommodation before taking the camera out for another long session.
San Isidro: olive trees and reflections at El Olivar
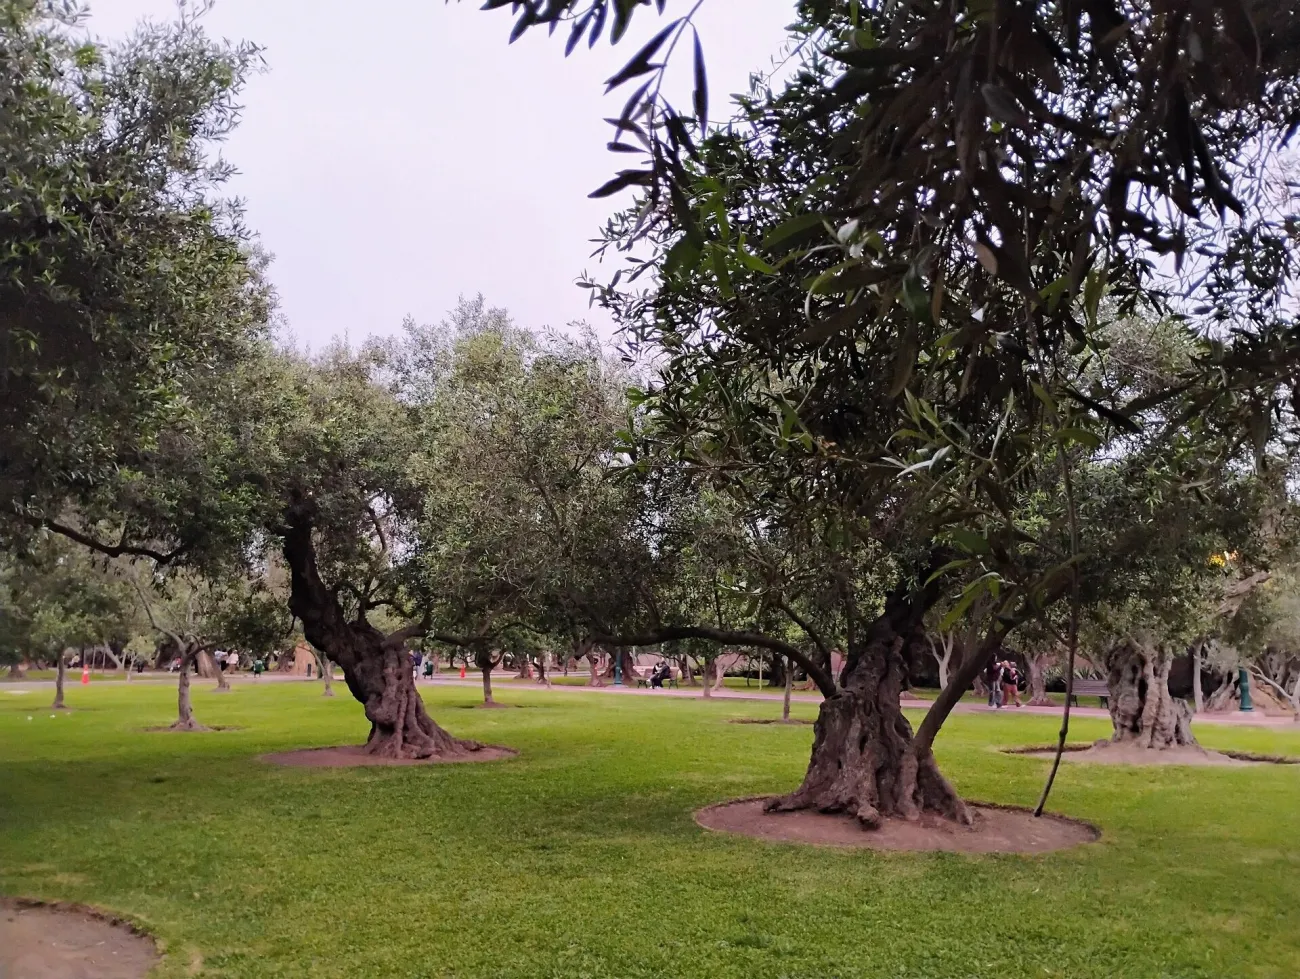

Use the Centro Cultural El Olivar at Calle La República 455 as a clear meeting landmark, then enter the public park paths. The municipal cultural-centre page confirms the address. You do not need to enter the auditorium to photograph the park. The olive grove, paths and pond belong to a different visual setting from Lima's monumental centre.
For a first frame, stand on a permitted path where the trunks repeat into the distance. Keep a gap between the nearest trees so the background remains readable. For a reflection, use the public path beside the pond and change your angle until the trees separate from the water's edge. PROMPERÚ's El Olivar guide identifies the pond and Constancio Bollar area.
Gentle morning or late-afternoon light can give the bark shape; cloudy light is useful for quieter colour and detail. Stay off planted or restricted ground, avoid disturbing birds and keep residents and children out of a close frame unless permission has been given. Arrange a taxi or continue to a known destination within San Isidro; this is a separate district visit, not a short walk from Plaza Mayor.
Taquile: a lake view and a portrait are different permissions
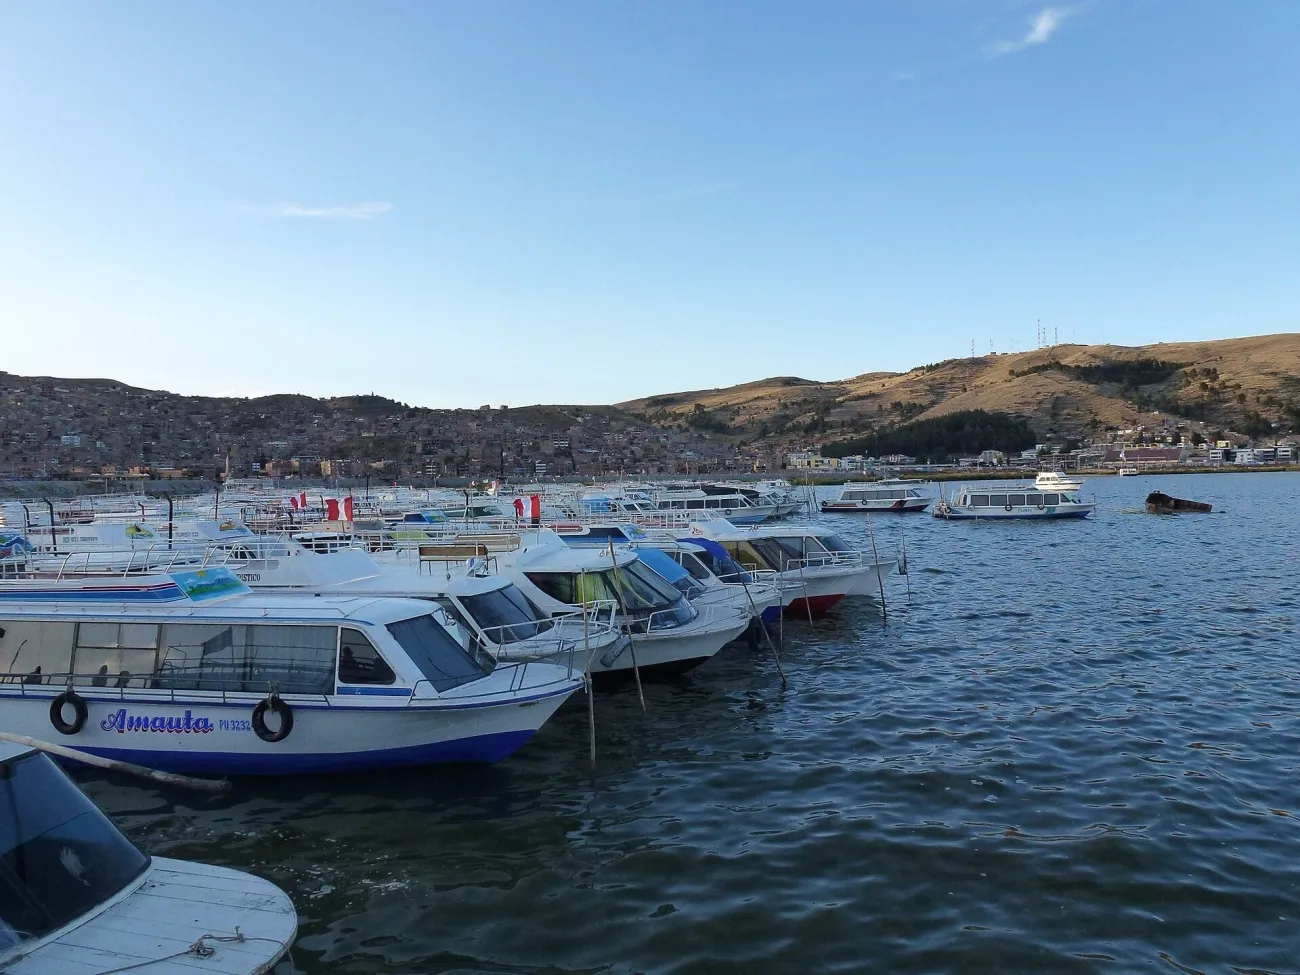

Start by confirming the departure port, the island landing and the boat's return plan with your operator or host. Taquile is a natural island, distinct from the Uros floating islands. Landings and walking approaches vary, so do not assume that every visit starts at the same staircase. Ask for the ascent, surface and time to the village before booking, especially if stairs or altitude are a concern.
From the village meeting point, ask a community guide about the permitted path to Mulsina Pata for a lake-and-terrace view. PROMPERÚ's Taquile visitor information identifies this viewpoint. At an authorised open section, place a terrace or path in the foreground and keep the lake horizon level. Do not move into a cultivated field to remove another visitor from the picture.
For a portrait or a photograph of weaving, speak to the person first and agree what they are comfortable with. Ask before a close picture of their hands or clothing as well as their face. Pay the agreed price for a demonstration or purchase, without treating that payment as ownership of unlimited photographs. UNESCO's account of Taquile textile art explains that it is part of daily and community life.
A daytime boat visit limits the light you can choose. An overnight with a legitimate host may create more time, but evening or morning photography still requires local permission and a workable return. Keep the fixed boat meeting more important than one final frame. Carry sun protection, warm clothing and enough water for the actual walk, and leave a demanding climb out if you are unwell at altitude.
Nasca: plan the Hummingbird as an aerial photograph
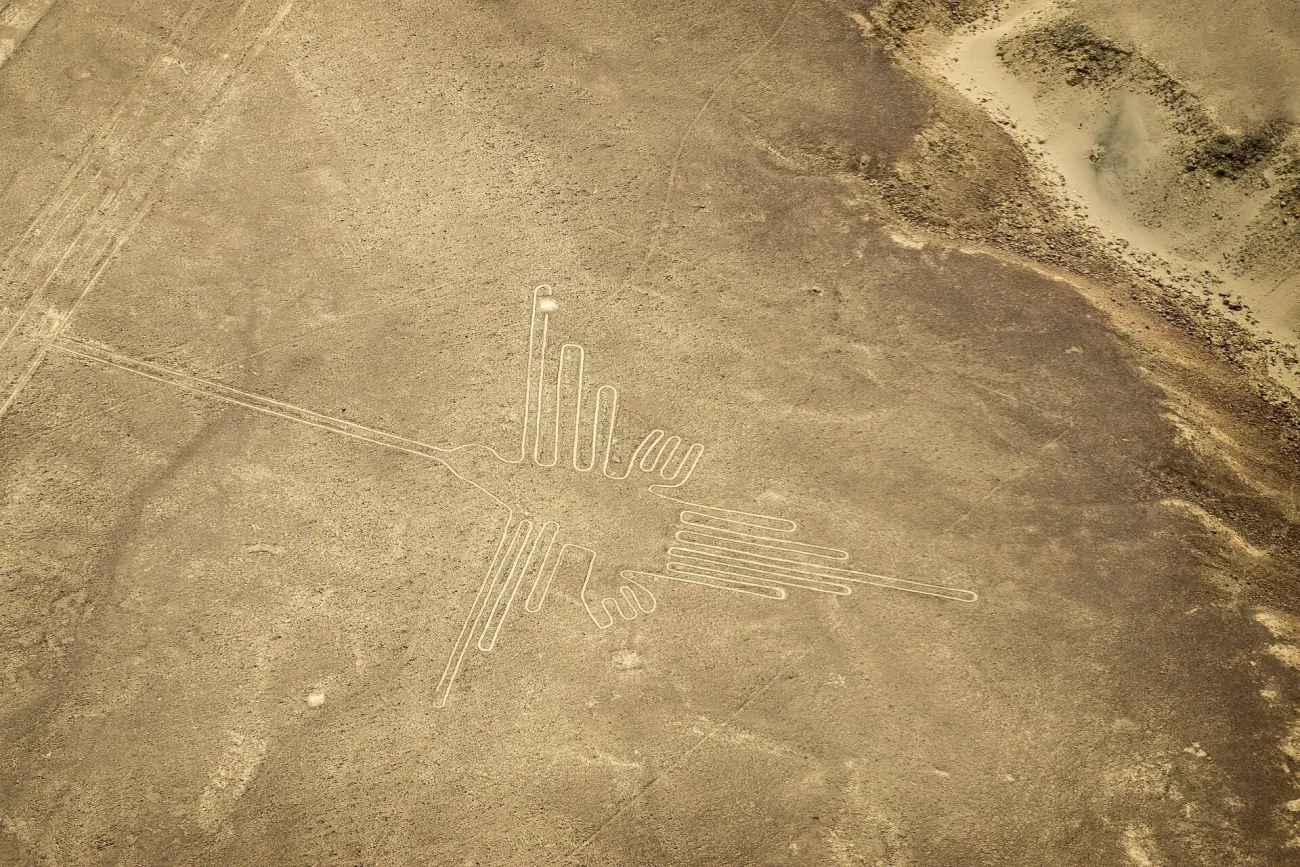

The familiar Hummingbird image is an aerial composition. A viewing-tower visit is a different experience and should not be sold to yourself as a substitute for the same angle. PROMPERÚ's Nasca Lines guide identifies aerial views of the Hummingbird and the separate viewing-tower option. Choose between them before organising the coast journey.
For a flight, confirm the actual air carrier, current authorisation, departure airfield, weight and luggage rules, fees and cancellation terms. Ask which geoglyphs form part of the planned flight and what happens when conditions prevent departure. Nasca's María Reiche airfield is a specific meeting destination; a seller offering a pickup elsewhere may sell a different transfer and flight package. CORPAC identifies the María Reiche airport in Vista Alegre.
Check current operating permission rather than trusting an old operator review. In its 2 August 2026 notice, MTC reported the preventive suspension of Aerodiana following an accident. That dated notice does not establish today's status of every carrier. A reseller accepting payment is not proof that a named airline is currently authorised to fly.
Follow the crew's instructions and keep equipment secured. Use a fast enough shutter for movement, avoid pressing the lens against a vibrating window and take several deliberate frames when the figure becomes visible. Do not request an unsafe manoeuvre or promise yourself a perfect bank angle. Leave room in the day for weather delays and for a flight that is cancelled. The main itinerary guide helps place Nasca within a realistic coastal route.
Keep the photographic plan small enough to use
For each outing, save a meeting point, one main frame and a return arrangement. Carry a cloth for windows or rain, a spare battery and enough storage, but avoid equipment that you cannot safely carry on steps or through a crowded square. Separate a photograph taken on your holiday from professional or commercial work: a public visitor ticket does not automatically grant filming, drone or commercial permissions.
Travel Tip: Before buying an excursion, send the operator the actual photograph or view you hope to make. Ask whether the booked route reaches a permitted position for that view, and what conditions could prevent it.
Peru photography questions
Does every Machu Picchu ticket include the classic photograph?
No. Viewpoints depend on the specific route. Compare the current official route map and entry conditions before choosing a ticket, and use the specialist planning guide for the full booking sequence.
Can I reach San Blas without a climb?
The approach from Cusco's centre is uphill and the upper viewpoint involves steps. If that does not suit you, ask about an appropriate drop-off and choose a lower public position rather than assuming the full route is step-free.
Can I photograph people on Taquile?
Ask the individual first and agree the purpose and any payment. Permission for a demonstration, a purchase or a group visit does not automatically include a close portrait.
Will a Nasca tower visit give me the Hummingbird aerial view?
No. The familiar Hummingbird composition is an aerial view. A tower gives a different perspective on particular nearby geoglyphs; compare the actual programme before booking.
Should I book every visit at sunrise?
No. Check actual opening and transport first, then choose a useful light window. An early ticket does not guarantee clear weather, and several of these photographs work well in ordinary daylight.
Last updated: