
Sign in
For Photos4Travel editors and team members.
Chile · Photo Spots
Chile Photo Spots: Where to Stand, Find the Light and Plan Access
A useful photo plan starts with the place you can legally stand, not the photograph you hope to copy. Chile's familiar views often involve gates, marked paths, altitude, a guide or a long journey back to your accommodation. Light is only one part of the decision.
The locations below suit different parts of a Chile trip. Use them to choose a small number of sessions with time to watch the scene change. The framing suggestions are practical starting points, not guaranteed conditions: cloud, wind, wildlife and current visitor access determine what is possible on the day.
Valle de la Luna: ridges and layers, with access confirmed first
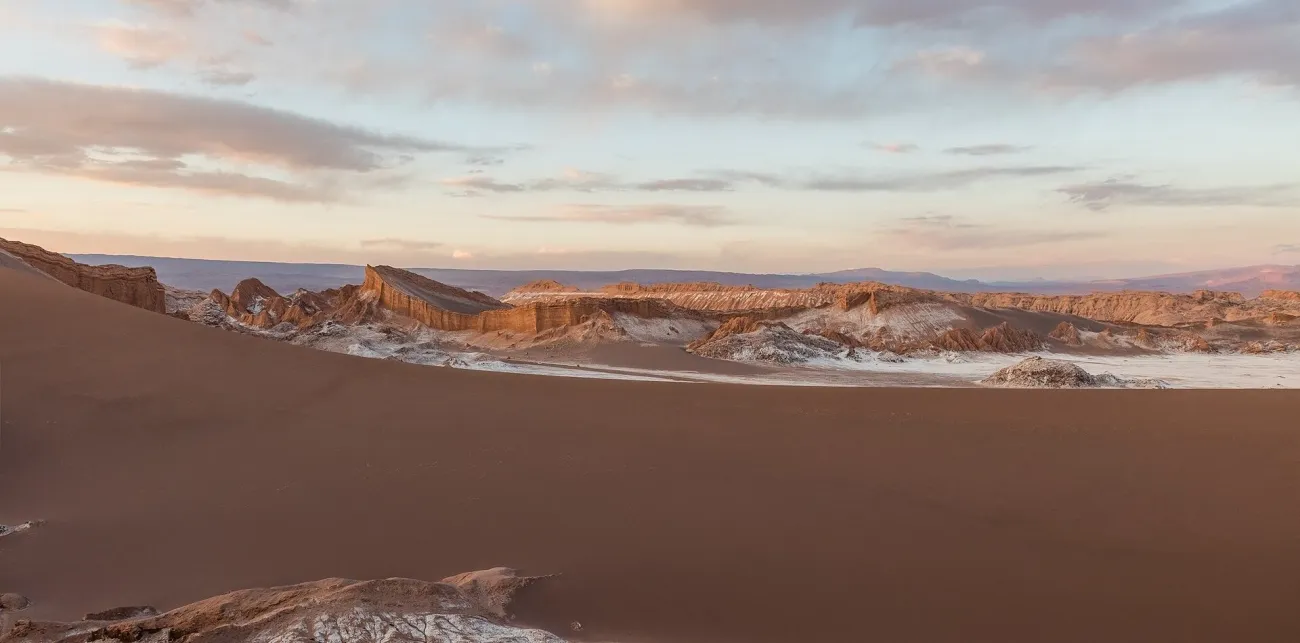

From San Pedro, travel to the controlled Valle de la Luna entrance by an authorised vehicle or permitted bicycle arrangement. CONAF's visitor information distinguishes vehicle and bicycle admission from the internal walking trails; do not assume you can arrive at the gate on foot and wander through.
Where open, use a marked viewpoint on the Duna Mayor route to build a frame from near sand and salt formations towards the valley's layered ridges. Try a tighter composition that separates two or three overlapping shapes instead of filling the frame with empty sky. Low side light can make the relief clearer, but the useful session must fit the authorised visiting window.
Checked 15 November 2026: the community operator displays closure notices alongside general hours, including Ckari closed after a 27 May 2026 safety assessment. Confirm current valley operation directly. Do not plan a Ckari sunset visit while the closure remains.
Stay within marked areas and keep any tripod clear of the walking line. A ticket does not give permission to climb an unmarked ridge. Visitor drone flights are prohibited.
El Tatio: photograph the steam from the safe visitor route
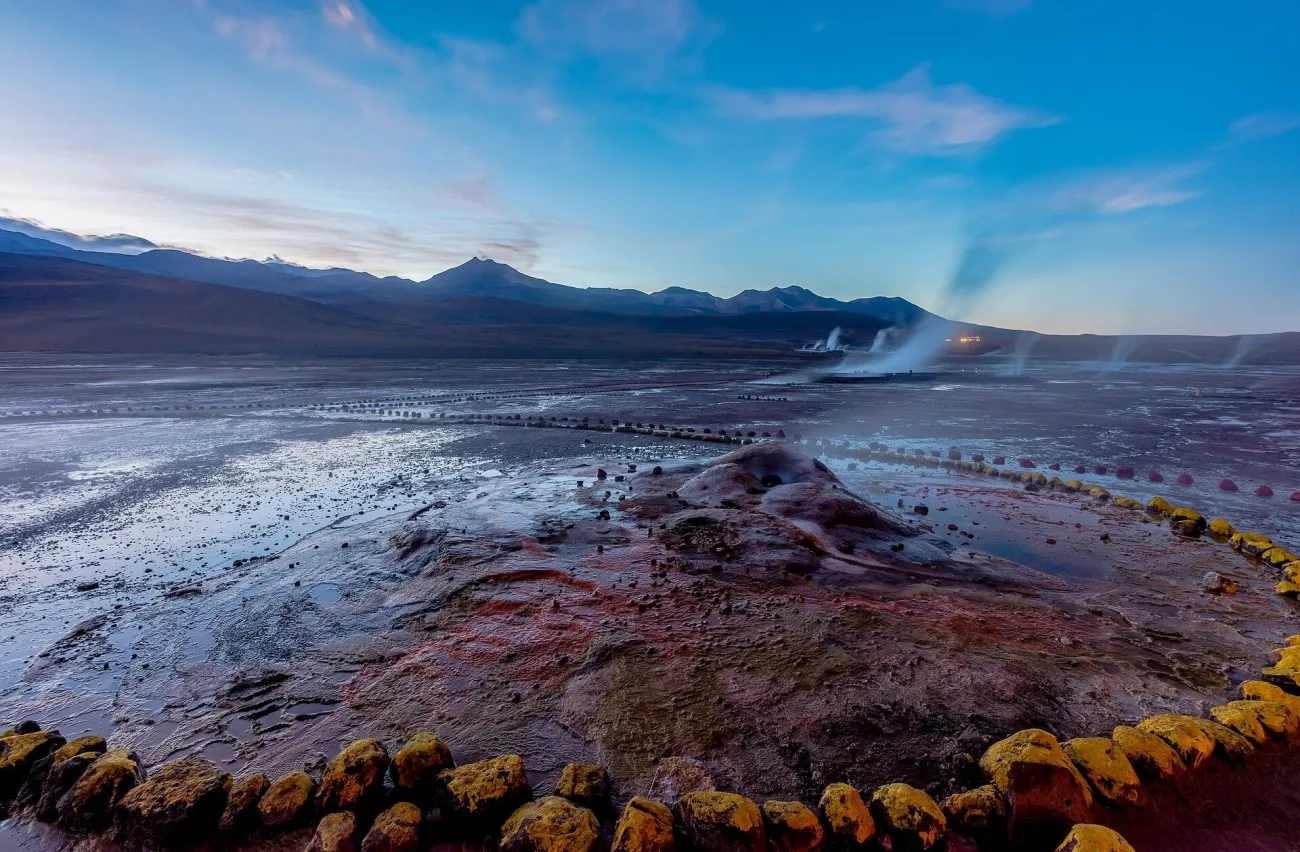

El Tatio is a high-altitude session, approximately 4,300 metres above sea level, normally reached on an early road journey from San Pedro. Book the transfer and ask about pickup, clothing, admission and the time actually available on site. The official destination information warns of extreme morning cold and a gravel-road approach.
From the marked visitor route, position yourself so steam has a darker mountain or ground background rather than disappearing into a bright blank sky. As the light changes, look for separation between individual plumes. A person already within a permitted area can give scale, but do not direct anyone closer to a vent or across a barrier for the picture.
Keep the camera ready before stepping out of the vehicle, so setup does not consume the first moments while you are cold. A manageable camera and warm hands are more useful than carrying equipment you cannot operate comfortably. Stay aware of the route beneath you while looking through the viewfinder.
The cold start does not remove the altitude risk. Leave this outing until it is appropriate for your health and acclimatisation, and change the plan if unwell. Ask the operator about tripod and drone restrictions rather than assuming a landscape setting means unrestricted equipment use.
Valle de Marte, or Death Valley: shape rather than footprints
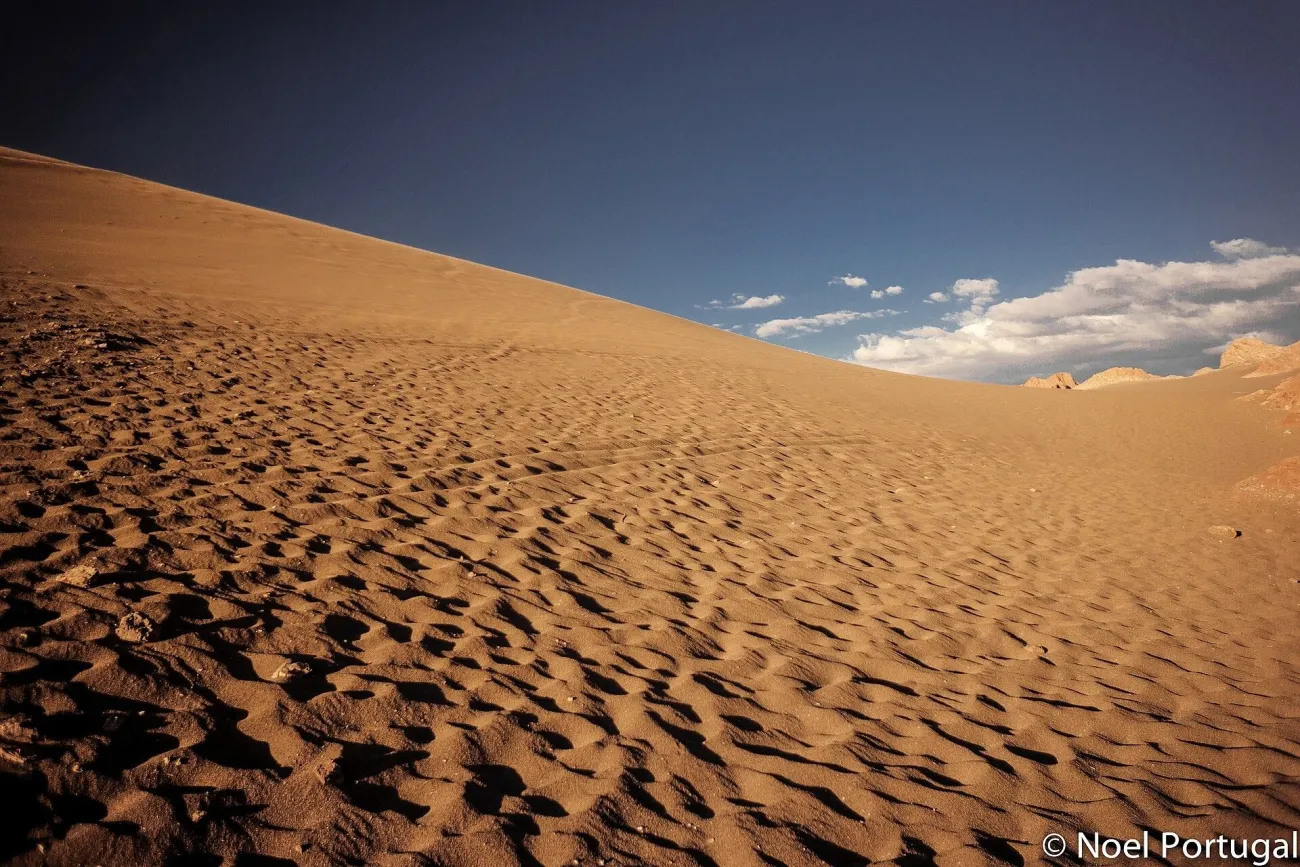

This is the Chilean Valle de Marte, also called Valle de la Muerte, near San Pedro—not California's Death Valley. The tourism board identifies its dunes and rock formations within the Cordillera de la Sal landscape. Confirm the current entrance, authorised route and collection point with a local operator before going.
Start at an approved viewpoint and look across the sand towards the enclosing rock. A clean curve of dune against rough eroded walls gives the scene structure. Side light helps reveal texture; direct overhead sun produces a flatter result, but can still suit a close pattern or strong shadow. Do not cross the dune simply to remove someone else's footprints from the frame.
If you are photographing sandboarding, stand where the instructor says it is safe and outside the descent line. Agree the photograph with the participant first. Sand and wind favour changing lenses less often and protecting equipment between frames.
The final walking surface can be loose and exposed. Wear suitable footwear, carry water and keep the return arrangement clear. No universal sunrise access, tripod permission or drone permission is established here; confirm these rather than treating an old tour schedule as a current access rule.
Laguna Chaxa: flamingos and salt-flat reflections
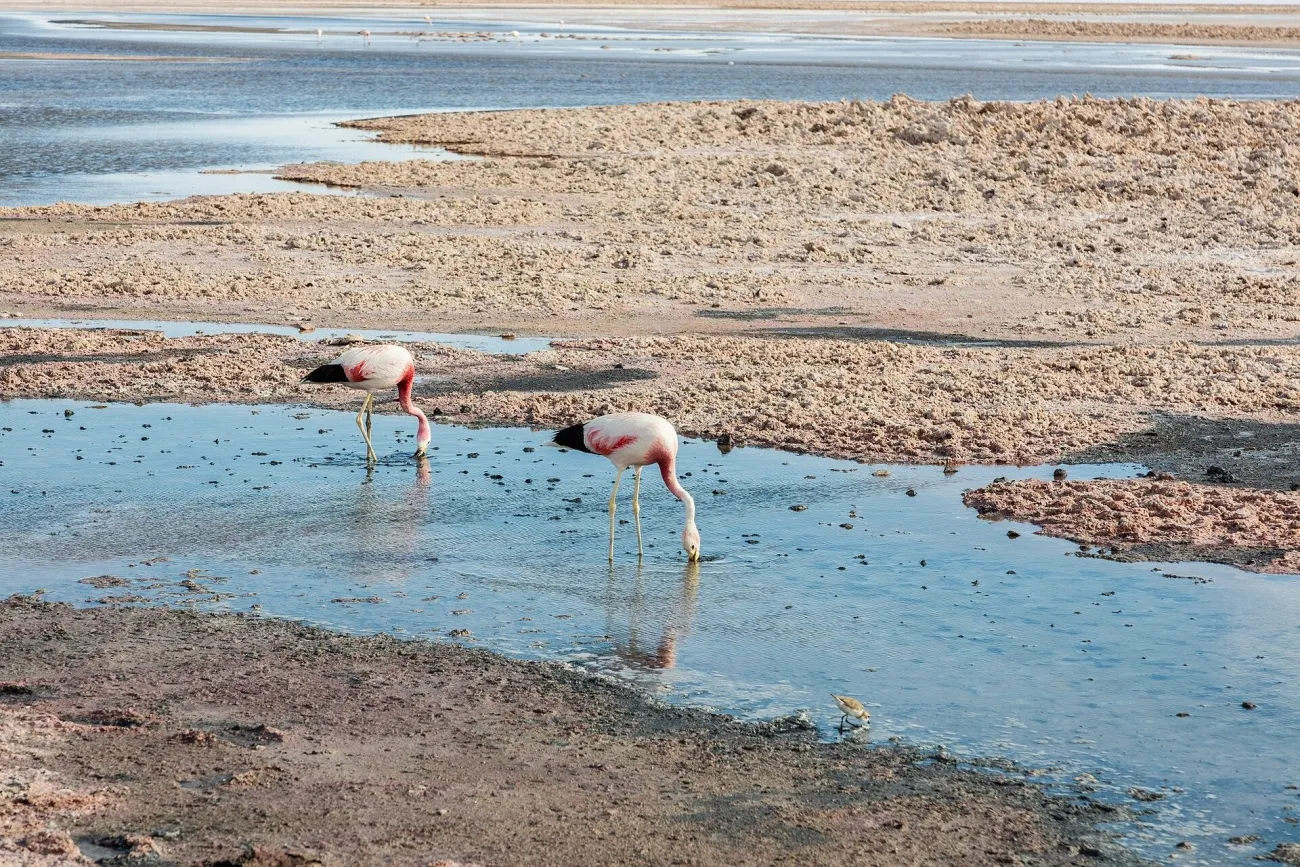

Laguna Chaxa, in the Soncor sector of Los Flamencos National Reserve, is a documented lagoon and wildlife setting. It should not be labelled a thermal lake or substituted for an unidentified old photograph. Travel from San Pedro by a reserved excursion or your own properly planned road journey, then follow the signed visitor path from the entrance.
Use the salt textures at the permitted edge as a foreground and leave room around the birds. A longer lens can isolate a flamingo against water or distant tones without moving closer. For a wider photograph, watch how birds and reflections are distributed before pressing the shutter; a small change in your position along the permitted path may make a clearer composition.
Calmer water improves reflections, while wind can turn the subject into colour and texture instead. Early or late light can be attractive, but the reserve's admission and closing times take priority. CONAF directs visitors to the current Ckapin Ticket information for this sector; do not confuse it with Socaire's high-lagoon booking process.
Remain on the path, keep noise low and never approach, feed or move wildlife. Drones are prohibited for ordinary visitors in the reserve. A tripod must not obstruct other visitors, and no pre-opening entry is implied.
Santiago: Santa Lucía for city detail, San Cristóbal for the wider view
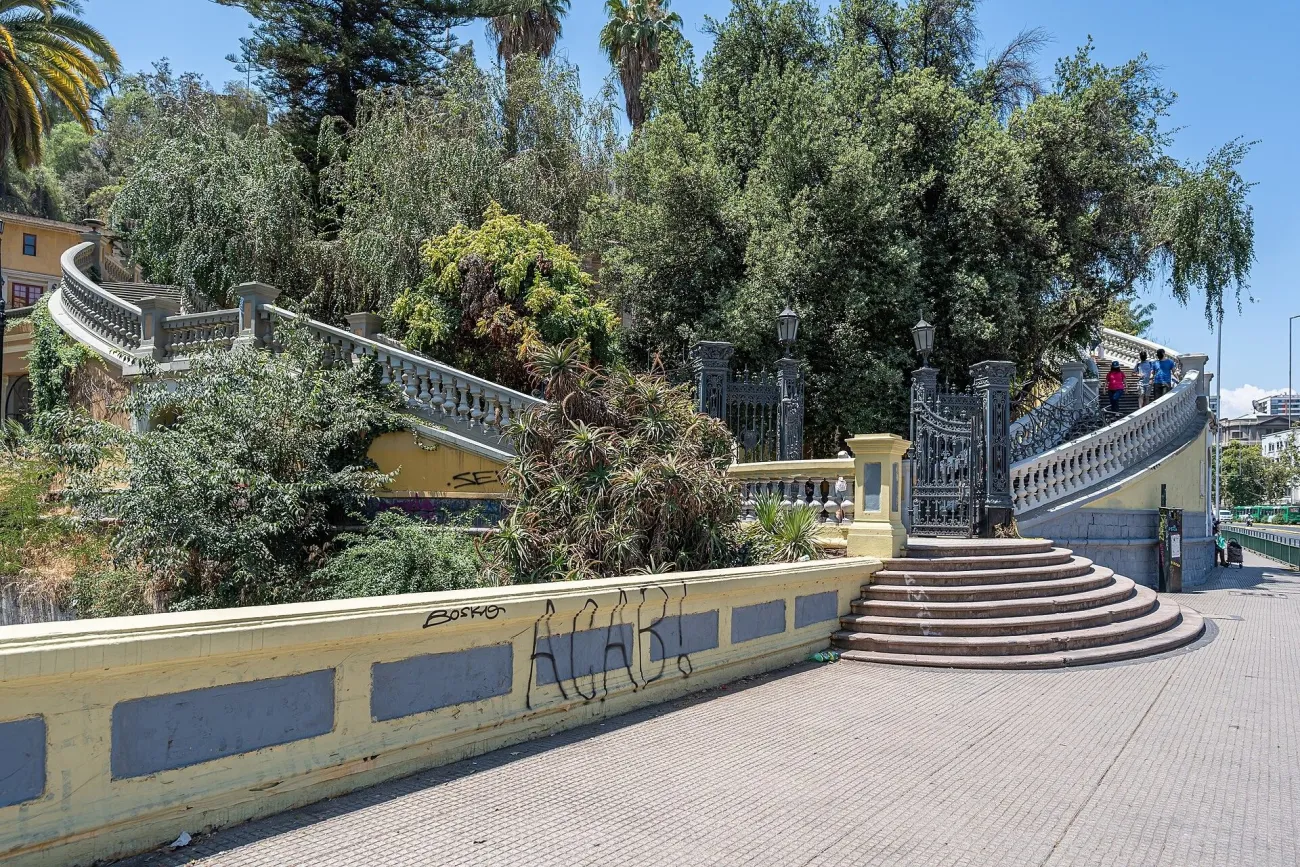

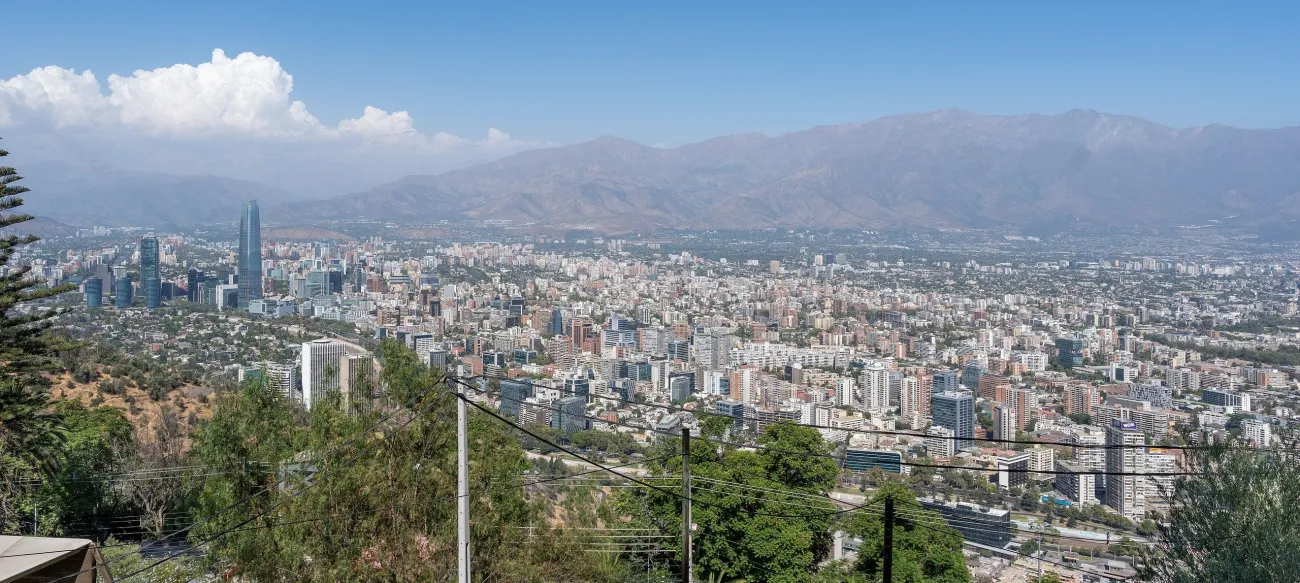

At Cerro Santa Lucía, approach from the Alameda side near Santa Lucía Metro and use the public paths and stairs to the open terraces. Frame buildings through vegetation, stonework or railings from an authorised standing area rather than treating every photograph as a summit panorama. Keep an alternative lower terrace in mind if the upper stairs do not suit your mobility or the light.
The municipality publishes seasonal hours and says the hill closes in rain. Confirm the day's access, especially on Monday, and do not build an after-dark session around an assumed open gate.
For a broader city-and-mountain relationship, use San Cristóbal within Parquemet, checking the official access information. Choose the current pedestrian or operating transport approach from a confirmed entrance such as Pío Nono, and check the last return service separately. From a public overlook, work across the city towards the mountain backdrop when visible; a tighter skyline frame often handles haze better than a very wide view.
Clearer visibility can matter more than a specific hour. Carry only the equipment you need, keep the path open and ask staff about tripod use. Park access, paid transport and drone authorisation are different questions; a cable-car ticket settles only the transport it describes.
Valparaíso: hillside layers around Cerro Alegre
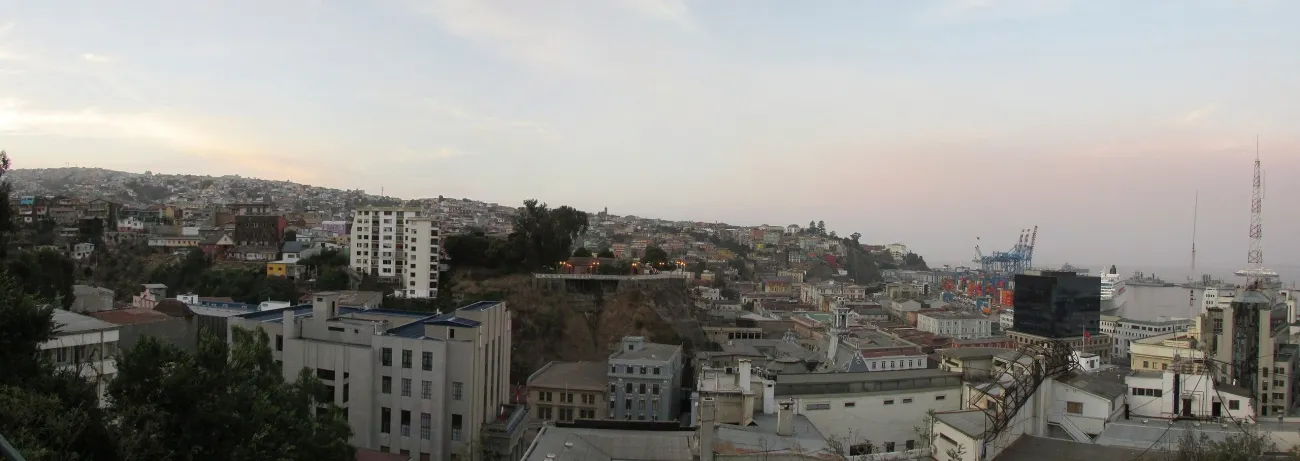

A practical approach starts around Plaza Sotomayor and Plaza de la Justicia, using El Peral ascensor if operating, then continuing to Paseo Yugoslavo. The tourism board's walking route links this area with the Cerro Alegre and Cerro Concepción viewpoints, including Gervasoni and Atkinson. Check the lift before depending on it; the surrounding walk involves slopes and stairs.
Stand on the public promenade and layer a nearby facade or roofline against the city and bay. At Gervasoni or Atkinson, look for a frame that explains the steepness instead of photographing only a brightly painted wall. Keep vertical lines deliberate and leave enough space for people to pass.
Soft cloud can suit architectural colour; stronger light may suit a contrast between a shaded lane and the brighter port beyond. Choose a daylight session and a clear route back rather than chasing the last colour into unfamiliar stairs. Keep the camera close when moving between viewpoints.
Residents' windows, doors and daily routines are not public sets. Ask before photographing an identifiable person, and do not block a doorway or set up a tripod across a narrow passage. No blanket public-street drone permission is implied.
Viña del Mar: Muelle Vergara from the waterfront
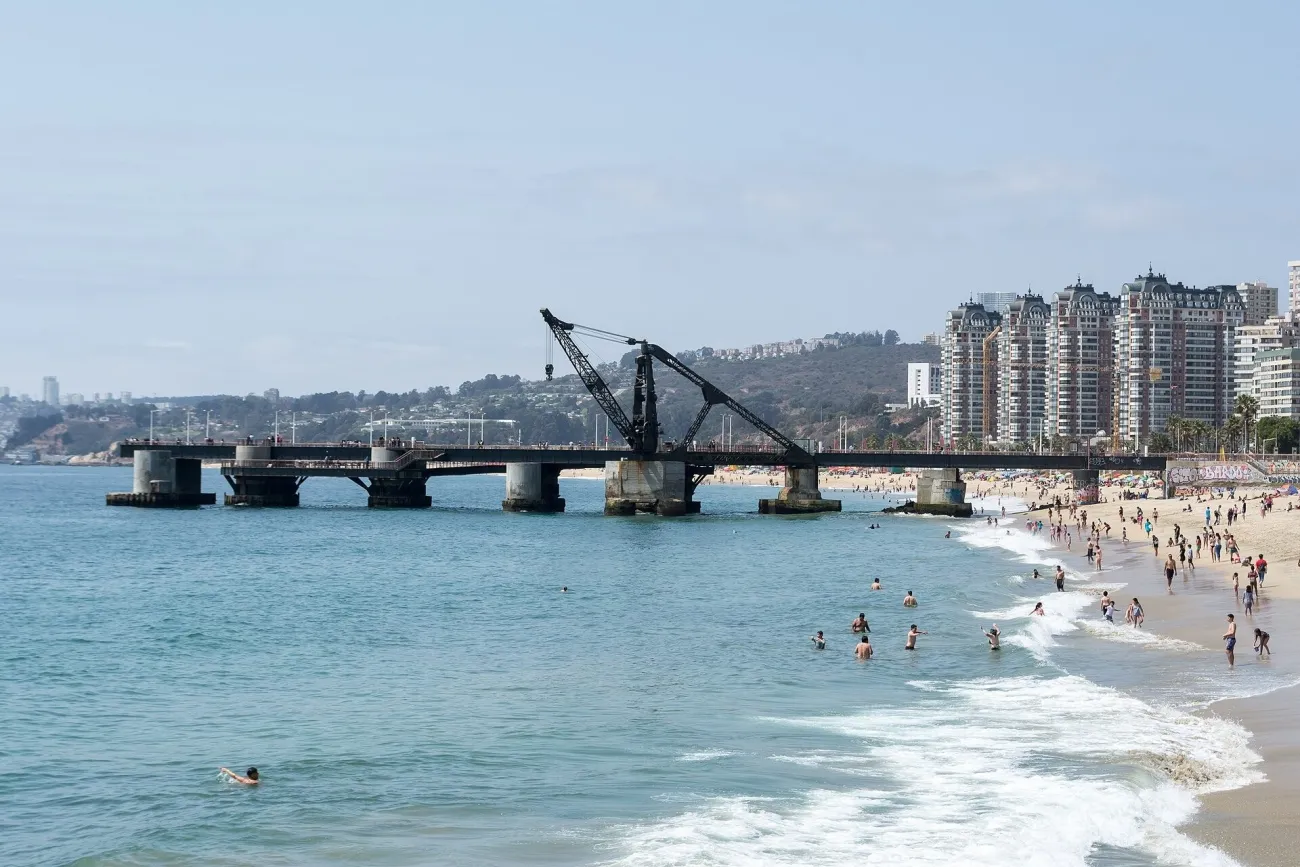

Muelle Vergara makes a useful subject when you want a coastal frame that includes the city's history rather than another generic beach image. The municipality's waterfront heritage description identifies a route starting here and continuing along the coast. Approach on the public promenade and inspect the current barriers before choosing a position.
From the landward side, use the pier's structure to lead the eye towards the sea. Move along the promenade for a side view if the axis is crowded or the light falls badly. Keep the horizon level and leave a clear relationship between the metal structure and the shoreline, rather than cropping away everything that identifies the setting.
Late light can give colour over the Pacific, while a cloudy day suits a more restrained industrial-coastal image. Neither requires standing on wet rocks or beyond a closure. Marejadas and local restrictions can make access unsuitable; a dramatic sea is a reason to increase distance, not reduce it.
Keep a tripod inside a safe pedestrian space and never on a barrier. Do not assume the pier itself is open because the promenade is accessible, or confuse photography access with permission to swim. Follow posted conditions and the maritime authority's directions.
Torres del Paine: Lago Pehoé without a nighttime trail ascent
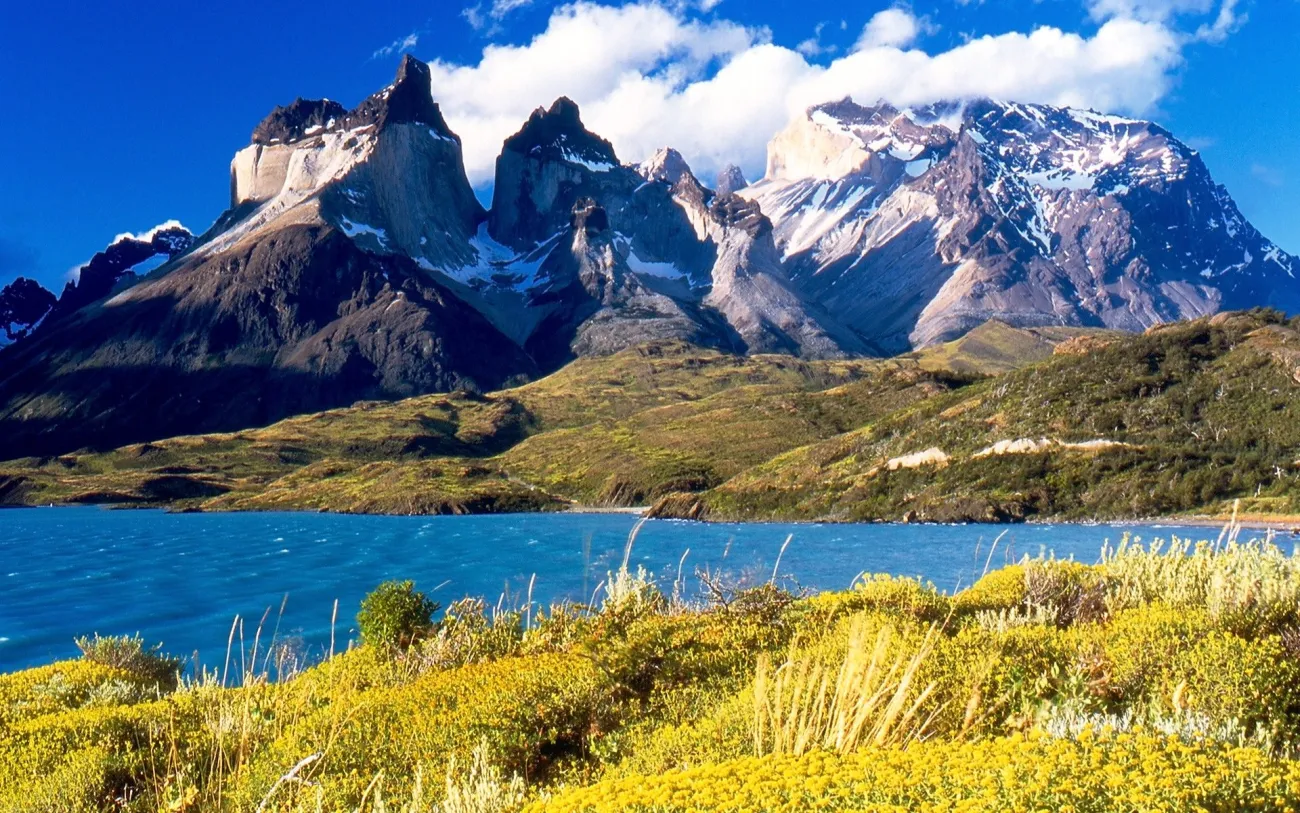

For lake-and-massif photographs, choose an authorised Lago Pehoé viewpoint and its proper parking area, rather than stopping a vehicle wherever the road gives a glimpse. Check the gate and road approach from your actual accommodation. A Natales departure adds a long journey before you reach the scene.
From a safe public standing area, use the lake or permitted shoreline foreground to lead towards the granite forms. Look for a composition that still works when part of the mountain is behind cloud. A tighter frame can make moving weather part of the photograph instead of turning a hidden summit into a failed session.
Wind can remove reflections quickly and make a large tripod difficult to manage. Keep your stance secure, stay back from edges and use a setup you can control. Never spread equipment into a road or step onto fragile ground to escape another visitor's frame.
CONAF prohibits trail walking without daylight. A road-accessible viewpoint has a different access question, but it is not an automatic exemption from gate hours or park instructions. Do not suggest a normal nighttime Base Torres ascent for sunrise. Ordinary visitor drone flights are prohibited; professional exceptions require prior authorisation.
Rapa Nui: sunrise at Ahu Tongariki
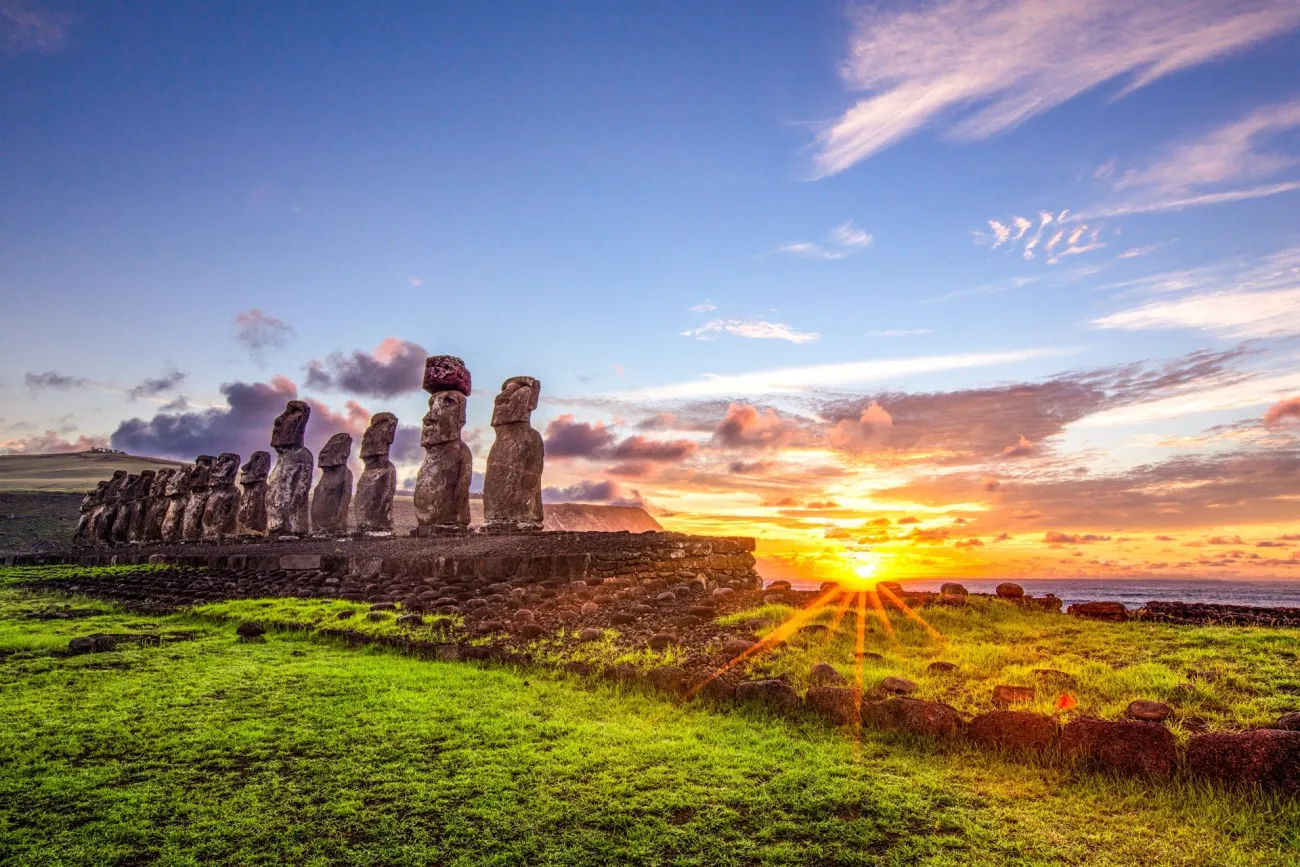

These are different compositions and should be planned as separate sessions. Ma’u Henua's park information identifies Ahu Tongariki for sunrise and Tahai for sunset. Arrange access and timing with an accredited guide, with transport from Hanga Roa and a clear pickup after the session.
At Tongariki, remain in the permitted viewing area and frame the row of moai against the changing sky. You do not need to stand on an ahu or touch a monument to make the scale clear. At Tahai, the evening view can work as a silhouette, with enough foreground to explain the coastal setting. Cloud may be more interesting than a completely empty sky; wait for a clear shape and separation rather than assuming colour will appear.
These are sacred heritage places, not props. Respect barriers, ceremony, other visitors and the guide's instructions. Ask where a tripod can stand without interfering. The park restricts drones and commercial filming or photographs without permission. A travel photo session does not authorise equipment, lighting or a commercial production setup. Keep the special-territory entry documents separate from park admission and guiding.
Build a photo day around access, then light
Keep the morning's main subject close enough to reach without rushing, and choose one realistic second session. In Atacama, do not stack a high excursion, a long transfer and a late astronomy outing simply because they happen at different hours. Tiredness reduces both enjoyment and the attention you need around rough ground.
For night-sky photography, ask an operator specifically about photography, not just visual observing. A group telescope session may have lighting, timing and equipment arrangements that do not suit your own long exposures. A darker moon phase and a moonlit landscape serve different aims. Research observatory facilities are not interchangeable with public astronomy tours, and no visitor access should be assumed.
Carry spare power and protect the camera from sand, rain and wind. Keep lens changes to a suitable place, and save the full collection address offline. The season guide helps with regional timing; health and safety covers altitude and remote travel. Treat an unsuccessful light session as a reason to enjoy the place, rather than a reason to cross a closed barrier.
Identify an Atacama water scene before planning a visit
A blue pool in an Atacama photograph may be a salt lagoon, a thermal spring or a managed visitor facility. Confirm the exact site with its community or operator before using a caption to plan a bathing stop. Water colour and a white mineral edge do not establish temperature, safe access or permission to enter. Chaxa is a wildlife-viewing and photography site; El Tatio is a high-altitude geothermal field. Their visitor routes and safety rules serve different purposes. Stay on the authorised route, and treat any permitted bathing activity as a separate, specifically confirmed visit.
Leave time to photograph San Pedro itself
San Pedro is more than an excursion pickup point. Use a quiet part of the day for village streets and the church exterior where access is permitted, respecting residents and religious services. Avoid making an identifiable person the subject without permission. The San Pedro base guide shows the church and explains the difference between staying in town and beyond it. Village time is also a useful alternative when a high excursion is unsuitable.
Travel Tip: Before promising yourself a dawn or sunset photograph, confirm three things: where you may stand, when the gate is open and how you will return. Then choose the light that fits.
Frequently asked questions
Can I photograph sunset at Ckari viewpoint now?
The community operator’s website displays a notice that Ckari is closed until further notice after a 27 May 2026 safety assessment. General hours remain elsewhere on the site. Confirm directly and do not plan access while the closure applies.
Is Laguna Chaxa a thermal lake?
No. It is a salt-flat lagoon and wildlife site in the Soncor sector of Los Flamencos National Reserve. Do not label an unidentified old lake photograph as Chaxa or describe salt pools as hot springs.
Can I hike to Base Torres before dawn for a sunrise photograph?
CONAF prohibits walking park trails without daylight. Do not build an ordinary visit around a nighttime ascent. Road-viewpoint access must also fit gate hours and park instructions.
Are drones allowed at the photo spots?
Do not assume permission. Ordinary visitor flights are prohibited in Torres del Paine and Los Flamencos, Valle de la Luna prohibits them, and Rapa Nui requires authorisation. City flying needs its own checks rather than permission inferred from a public viewpoint.
Do I need a guide for Rapa Nui photographs?
The national park requires an accredited guide and admission. Arrange the site sequence and photo timing with that guide, and check authorisation separately if the work involves commercial photography or filming.
Last updated: